Prop Asset Creation
Mesh
Main Mesh
This is a 3D model of the prop, which will be visible when the camera is close to it. The actual mesh file contains vertices (their coordinates, UV mapping, normals, and colors) and triangles.
It's created using 3D modeling software such as Blender, 3ds Max, Maya or SketchUp.
Model Complexity
It's recommended to stay within reasonable triangle counts based on the size and detail of your model. You may look at examples of vanilla props or assets by other creators for reference.
The absolute limit for a mesh is 65536 vertices.
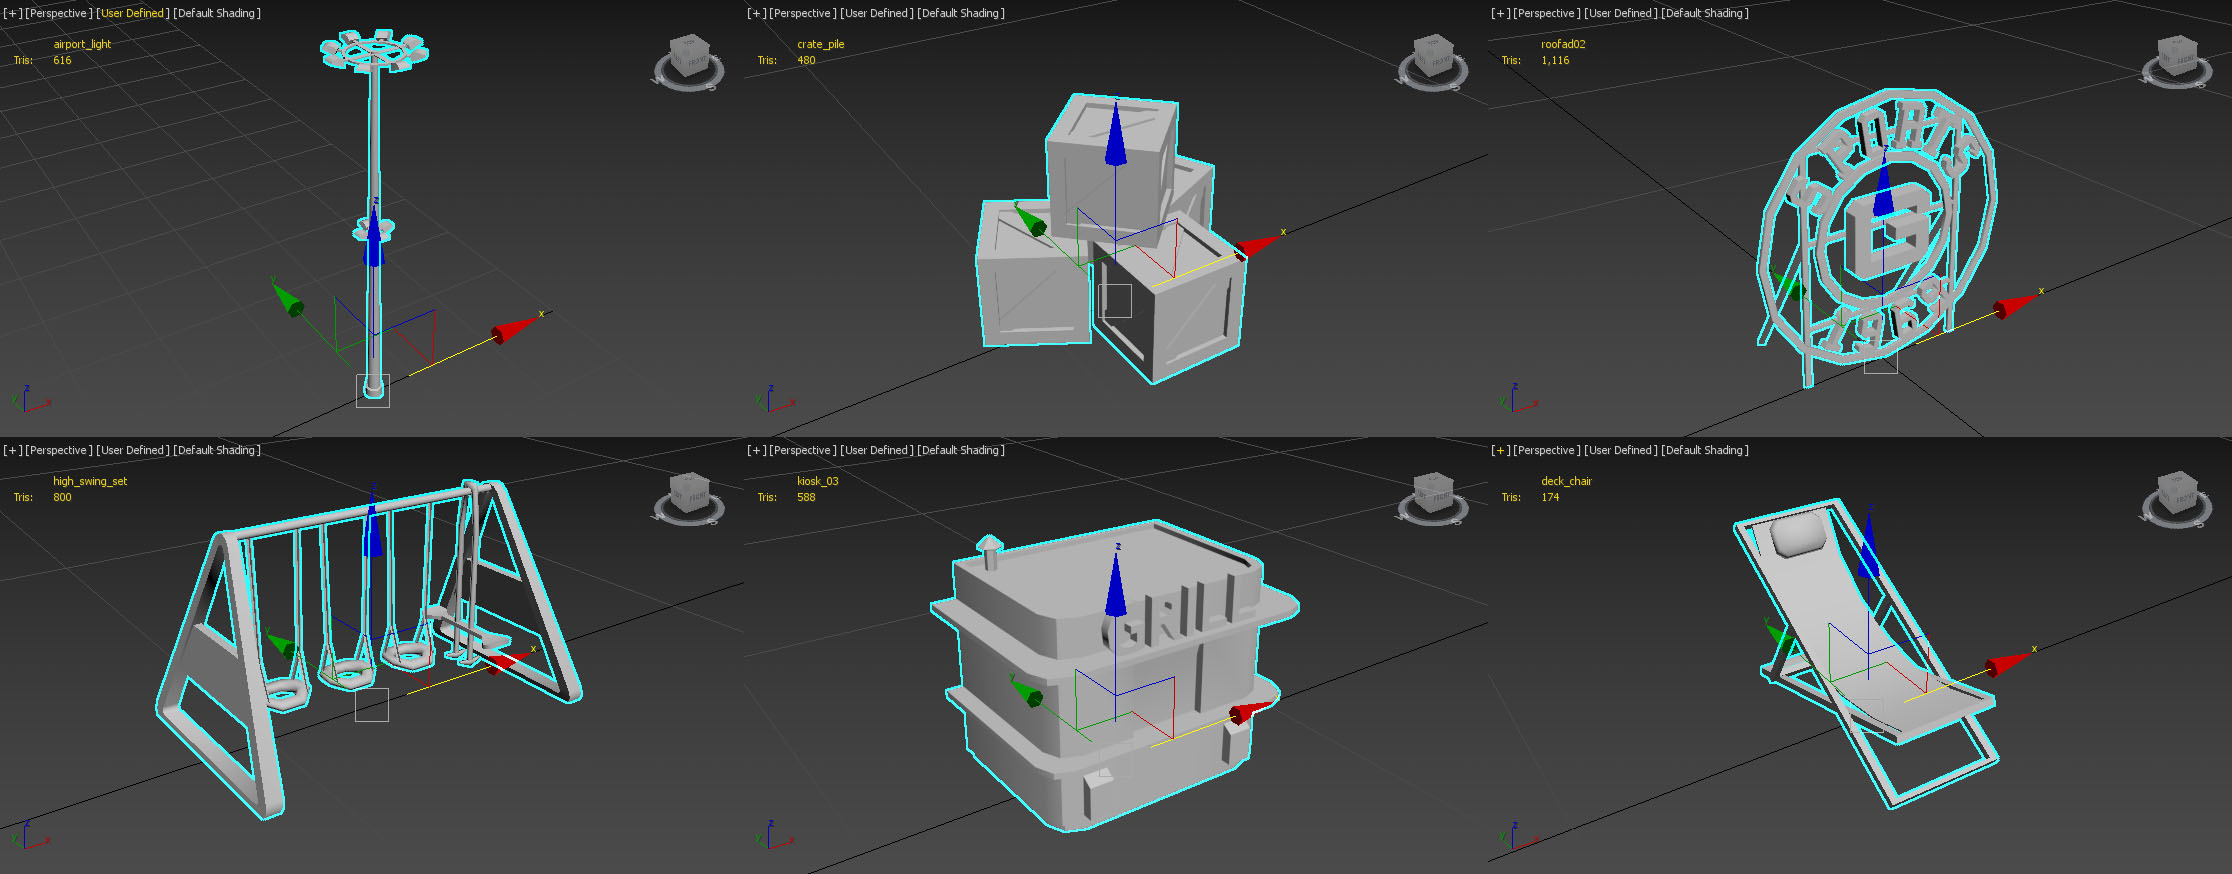
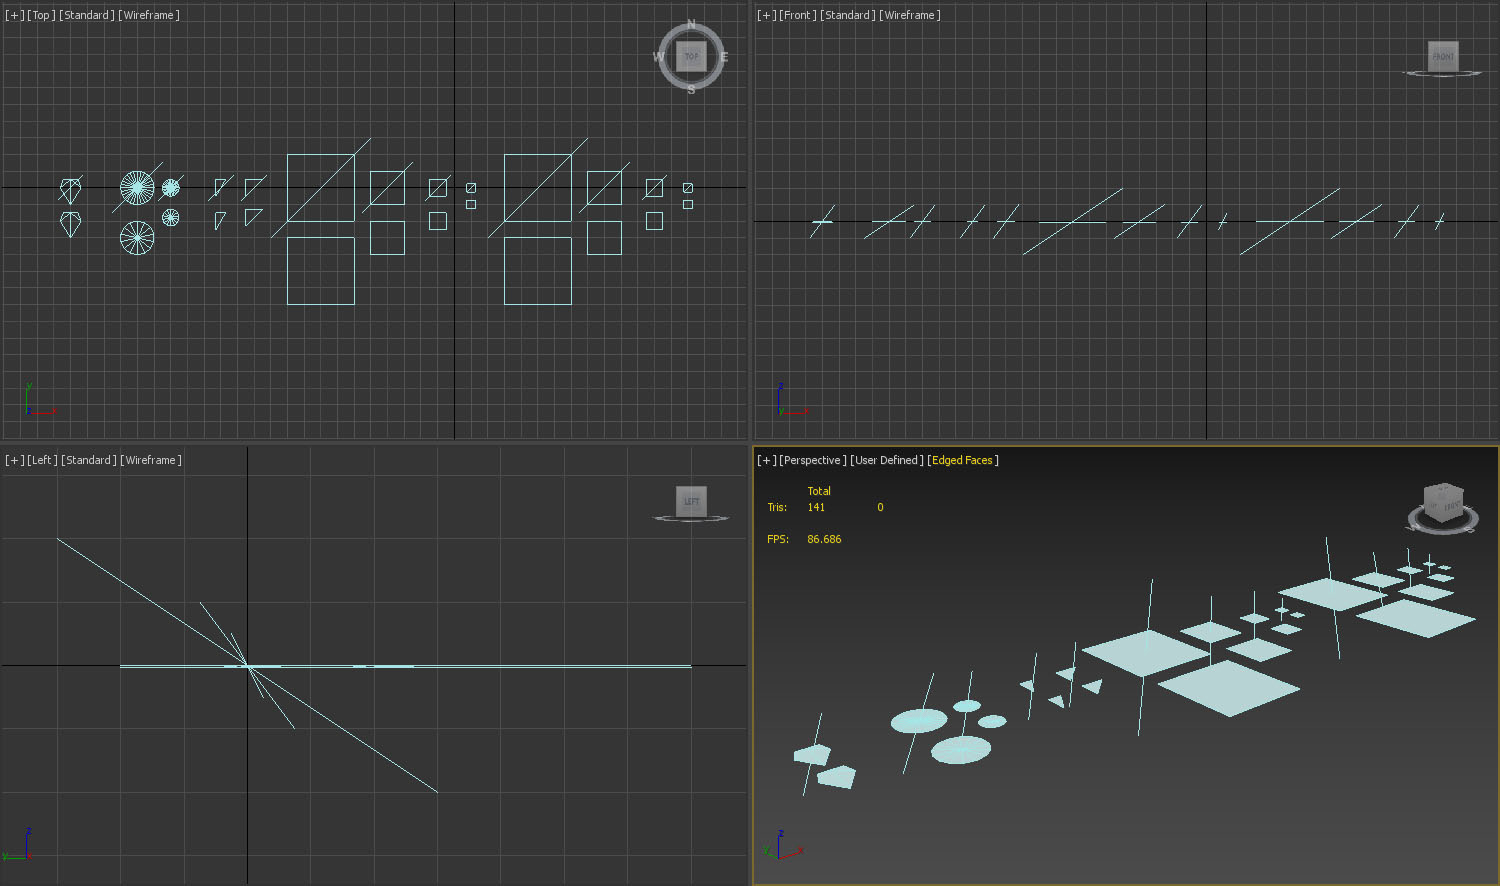
Triangle counts of some vanilla props.
You can use Mesh Info by SamsamTS to check triangle counts of assets.
LOD Mesh
LOD stands for level of detail. This is the mesh visible from a distance. It must be as simple as possible. Props are usually very small so a model with 1-6 triangles could be enough.
If you don't provide an LOD mesh, the game will try to generate one automatically, which may have visual issues, so it's highly recommended to make a custom LOD mesh.
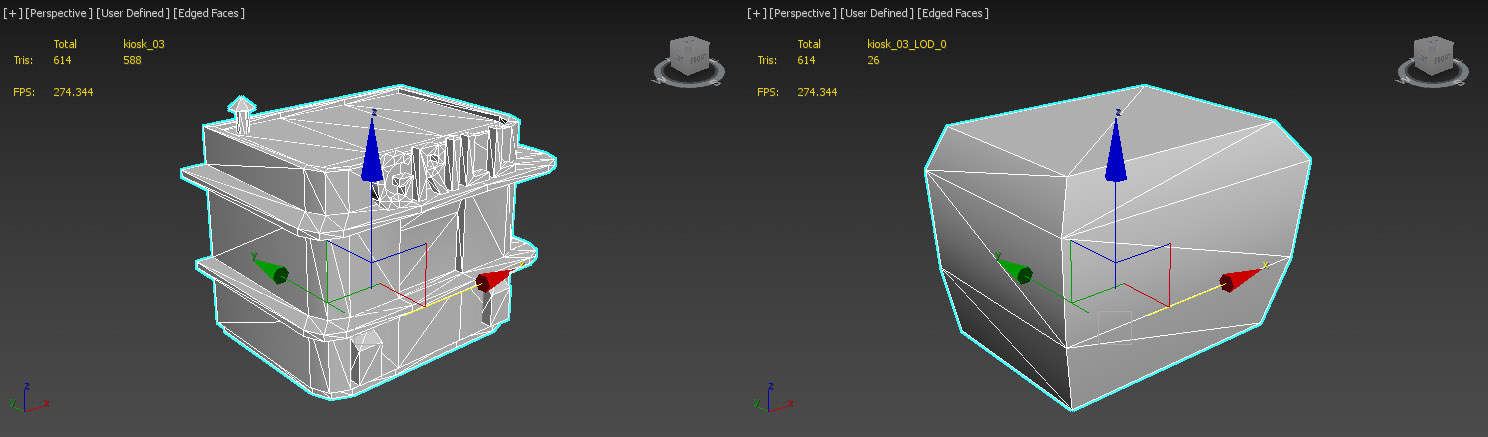
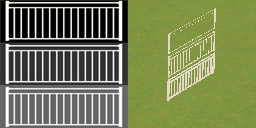
Comparison between main and LOD meshes for the vanilla grill kiosk.
UV Mapping
For the main mesh, you are allowed to UV map outside the 0-1 area (main tile), so you can tile the entire texture multiple times on a single face.
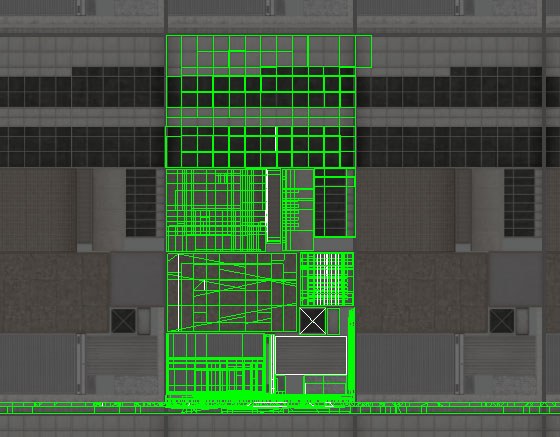
Example UV mapping using visible horizontal tiling on the bottom.
LOD
For the LOD mesh, the UV mapping must be within the 0-1 area (main tile) of the UV map, no tiling is allowed. This is because ingame all the LOD textures are combined into a single texture called an atlas, so having incorrect uv mapping will end up putting the texture of some other random prop on your LOD.
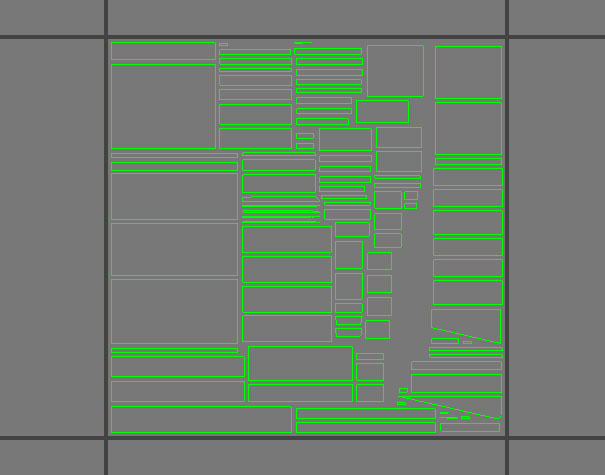
UV mapping for LOD mesh using automatic mapping in 3ds Max. No overlap and contained within the main tile - good for baking.
Pivot / Origin
The pivot point or origin represents the center point on the ground, where the prop will be plopped. It's usually represented using a red/green/blue axis gizmo.
Transform
Make sure you are exporting a single object, which doesn't have any rotation or scale.
This can be done using "apply rotation & scale" in Blender , or "reset xform" in 3ds Max , and exporting only the selected object.
Vertex Paint
The vertex color blue channel determines snow behavior on winter maps - 0 means no snow will be visible.
Vertex colors are also used for specific shaders like AnimUV for scrolling or multi-frame animations, or PropRotating for rotating animations.
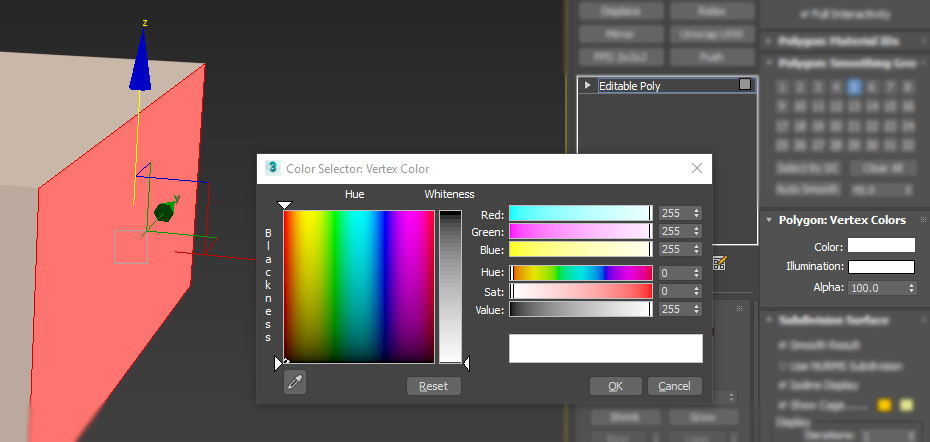
Vertex painting in 3ds Max.
Culling
Prop culling is when a prop disappears when you look away from the center of it.
If your prop has a low height or is wide/long, it's recommended to add an invisible triangle which is bigger than your actual mesh to make the game think the prop is larger than it actually is, which will reduce the chance of it disappearing.
Infinitely thin triangles made by putting 2 of the 3 vertices in the same place.
Formats
- FBX (2015 or older) (most commonly used)
- OBJ (doesn't support vertex colors)
- DAE
Textures
These determine the color and material properties of your prop.
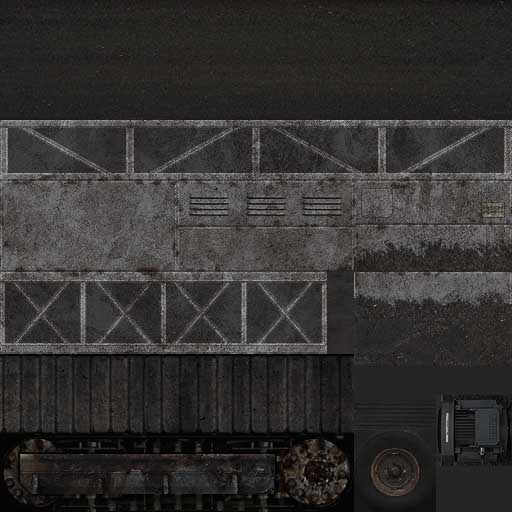
Resolution
All imported main textures must be the same resolution.
Powers of 2 is a standard practice in 3D graphics, which means resolutions such as 1024x1024, 1024x512, 256x512, 2048x128 etc. It is recommended to stick to this standard, otherwise, your texture may be corrupted by compression, which may be more visible at longer distances or grazing angles. The smallest allowed resolution is 32x32.

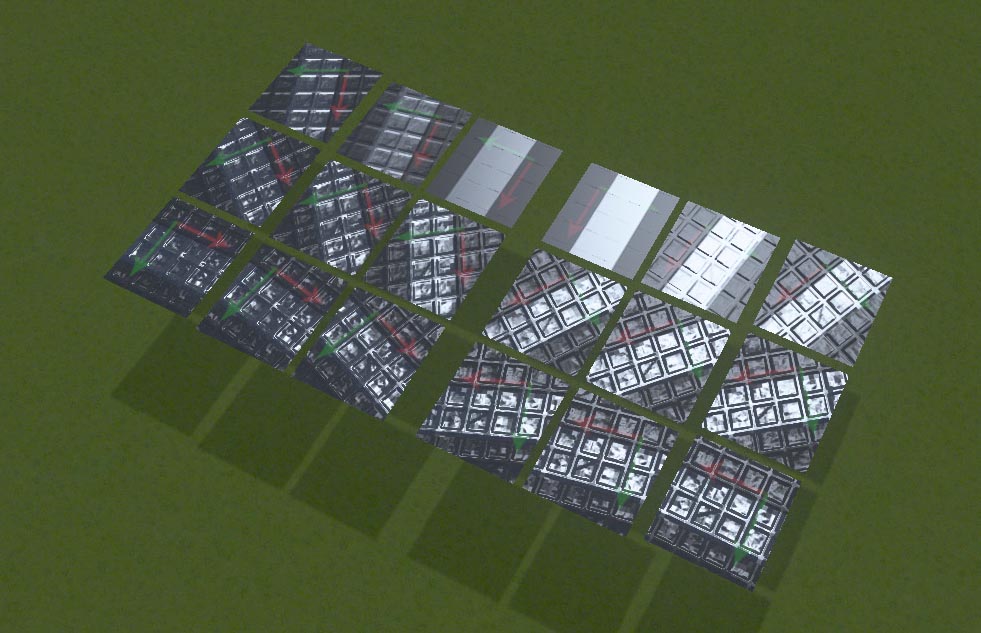
Texture sizes of various vanilla assets. See the resolution in the top right corner of the preview window.
Make sure texture quality is set to high in the game's graphics settings, otherwise, your imported textures will be downscaled to a lower resolution.
LOD Textures
All imported LOD textures must be the same resolution.
If you don't provide LOD textures, the game will try to bake them using the UV mapping your LOD mesh has, and that may cause visual issues, so it's recommended that you create your own LOD textures using baking.
Diffuse
The main color and texture of your asset.
It will look very bright, contrasty, and saturated in the game, so make sure to reduce the saturation and limit the brightest parts to a medium/light gray below 140 RGB.
If you don't import a diffuse map, it will default to white.
Example diffuse texture for a conveyor prop.
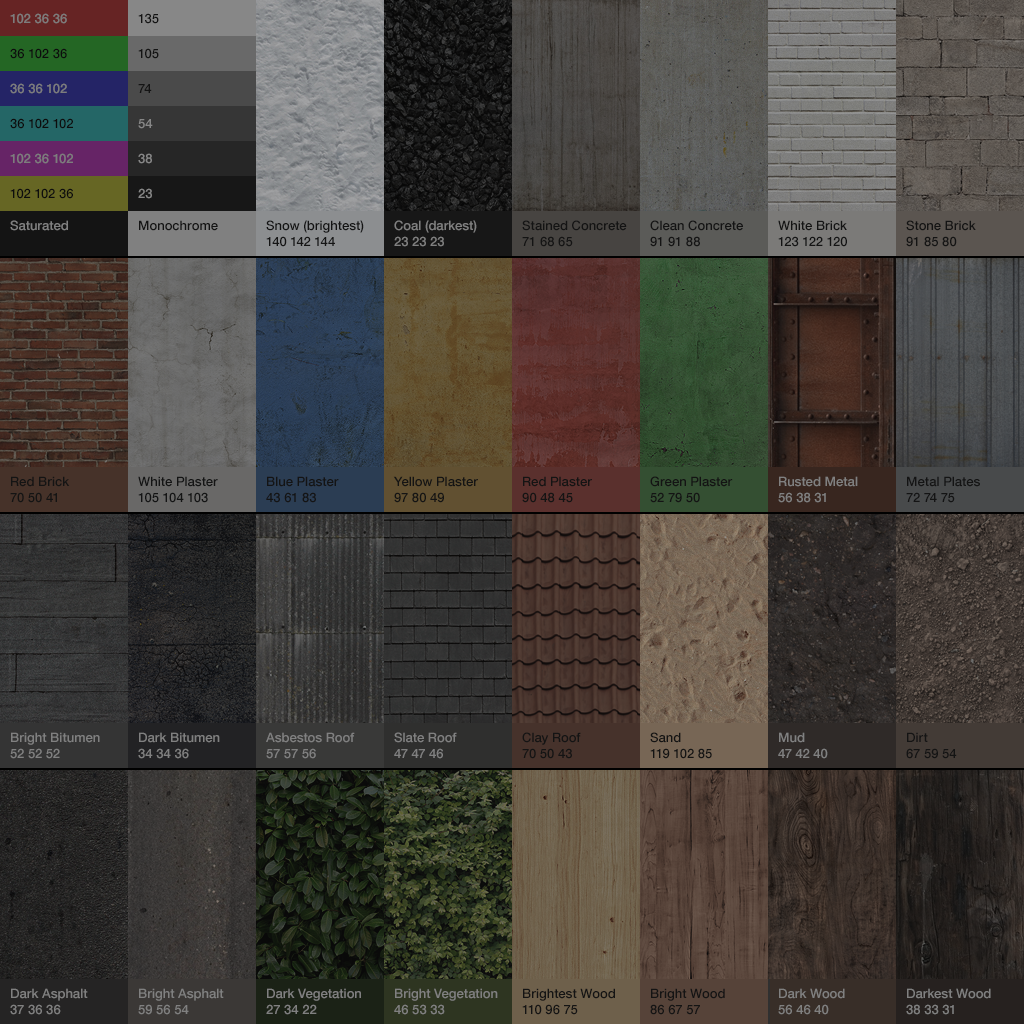
Color guidelines.
Alpha
Transparency, white means opaque or visible, black means transparent or invisible. Gray values may affect how it looks from a distance or at an angle.
Semi-transparency is not supported, you need to use the rotors shader for that.
If you don't import an alpha map, it will default to fully opaque or fully visible.
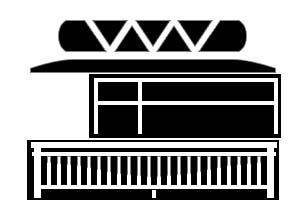
Example alpha texture for some railings and metal beams.
Using lighter values for the invisible parts will decrease the chance of small details like railings disappearing completely.
Color
Determines which parts will be affected by color variations. White means fully affected and black means not at all.
The diffuse will get multiplied by the color variation, that means the resulting color will look darker than the original diffuse.
If you don't import a color map, it will default to full color, but the "use color variations" setting must be enabled for the colors to appear.
Illumination
Allows for diffuse contribution illumination. Black means no illumination and white means the brightest possible illumination.
There are parameters for blinking illumination or disabling illumination during the day.
If you don't import an illumination map, it will default to no illumination.
Example illumination map for a torch.
Specular
Reflectivity, black means no reflection and white means max reflection.
The specular highlight from the sun is very big and bright, so you might want to use very low (0-10%) specularity for surfaces facing upwards.
If you don't import a specular map, it will default to no specularity.
Example specular map for a roof water tank.
Transitions between different specular values produce artifacts on the normal map and vice versa, even if a normal map is not imported.
Normal
Also sometimes called a bump map, adds fake depth or form by affecting how the lighting appears.
This can be made from the diffuse or a height map (brighter colors will look extruded out more) using a normal map generator online , a photoshop plugin like xNormal , or standalone software such as CrazyBump .
The normal map generator should be set to +X +Y, which means no color channel inversions are required. Read more in the normal map article .
High specularity and normal map don't work well together because of the compression, so you might want to paint over shiny parts with a solid color before generating a normal map or paint over these parts 128,128,255 on the final normal map.
If you don't import a normal map, it will default to a flat normal map - no bump.
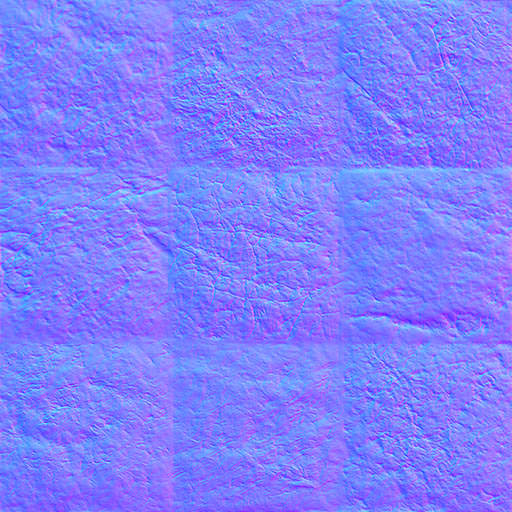
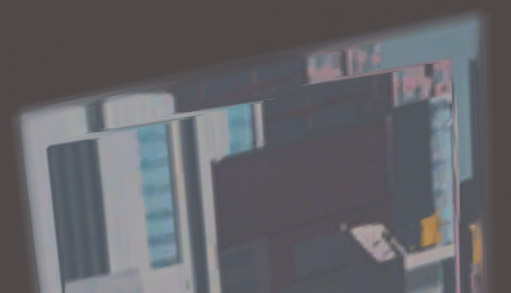
Example normal map for rocks.
Problem: normal maps appear incorrectly if the asset importer mesh rotation feature is used.
Problem: default normal map value is 0.5, which isn't possible by using 127(left) or 128(right). Image shows the same flat normal map on faces with different UV rotation/flip.
Format
Use a lossless format like .PNG.
The game supports other formats as well, but there is no reason to use another one, it doesn't matter how much your texture is compressed or even if it's completely solid or complicated, the game will convert it to a DXT format, so the final size won't be affected by anything other than resolution.
Make sure the texture is 8 bits/channel because a 16 bits/channel image can't be imported. Do not use the "Smaller File (8-bit)" feature in the Photoshop Export As window, as that creates an indexed color image, not an 8 bits/channel one.
Import
Example Asset
Source files of an example prop ready for import.
Naming
The mesh can have any name, but it's not recommended to use spaces or underscores, as the name for the lod mesh name will be meshname_lod.
The textures must have the same name as the mesh, but with the texture type identifier after it, so the result will be names like meshname_d.png and meshname_lod_d.png
Import Folder
You should place the mesh and texture files in the import folder located here:
%LocalAppData%\Colossal Order\Cities_Skylines\Addons\Import
The AppData folder is hidden by default, you can access it by copying and pasting the path into the file explorer, or pressing Windows + R and typing in appdata.
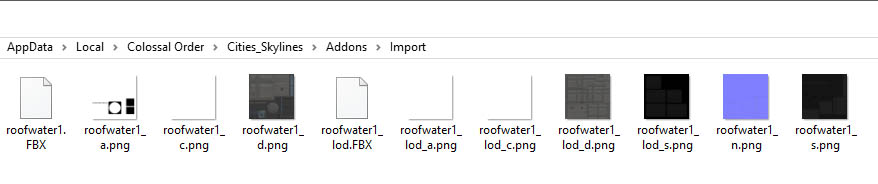
Files ready for import.
Template
The template you choose will determine some things about your prop:
- UI category
- item class (UI sub-category)
-
general settings (create ruining, scale, use color variations)
- shader, material properties (color variations)
All of those things can be changed later in the editor itself or using ModTools or other mods.
Import
After you choose your mesh, depending on how it was exported, you might need to set the correct scale and rotation, scale 100 and rotating 3 times around X-axis are common necessities.
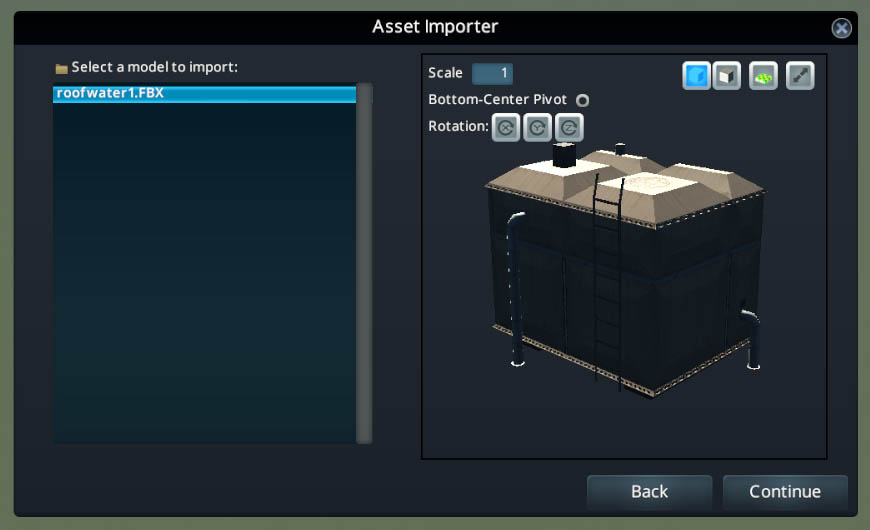
Importing a mesh in asset importer.
Using the mesh rotation feature will result in broken mesh tangents - that means the normal maps will appear incorrectly or not at all on some parts. To fix this, don't use the rotation feature and make sure the mesh is rotated properly before import. If you need to use the mesh rotation feature - use the Mesh Import Rotation Tangents Fix mod to fix it.
If you get an unsupported color error, one of your textures might be a 16 bits/channel file, you need to change it to 8 bits/channel, in Photoshop: Image > Mode > 8 Bits/Channel.
If the mesh preview doesn't display or you can't continue, you may have a problem with it such as multiple mesh objects, other entities like dummies, cameras, lights, or layers in the exported file.
Editor
Effects
You can add effects such as lights and particles, and change their position and direction.
The "always active" toggle has no known effect, it's only enabled for the vanilla red/orange roof warning lights, but they still turn off if the building has no electricity or is turned off.
General Properties
- availability (ingame, map editor etc.)
- create ruining (shows map theme ruined texture on the ground)
- max/min scale (random scale variation for each plopped prop)
- use color variations (may require to save/load for the toggle to take effect)
Material properties
You can change the 4 color variations.
Editor Advanced
Various things can be changed with the use of ModTools scene explorer Ctrl+E or running scripts in the console F7, or specific mods.
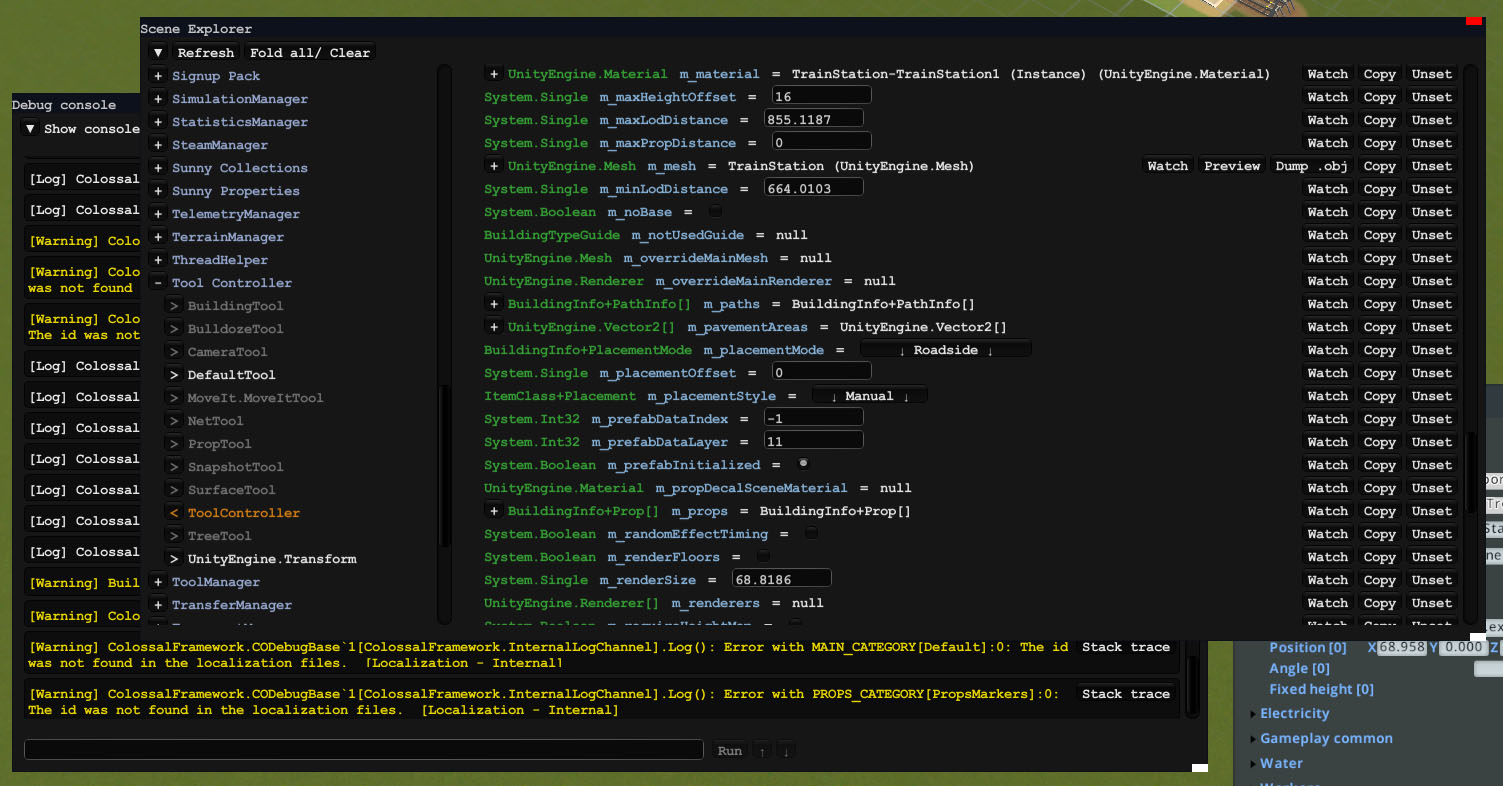
ModTools scene explorer and console.
Item Class
Contains information about what type of prop it is. It can be changed using Asset ItemClass Changer by Snow_Cat .
UI Category
UI category determines in which menu your asset will appear. It can be changed using Asset UI Category Changer by Snow_Cat
UI Priority
UIPriority determines item order in the menu. It can be changed Asset UI Priority Changer by Snow_Cat or a script .
Shaders
Scripts for commonly used prop shaders:
- Default
- Fence conforms to the ground. If you use the "high/low vegetation" props as the template when importing, the resulting props will have fence shader, but will also be height-adjustable using Move It!, which is unusual for props using the fence shader.
- Decal projects the texture onto the ground.
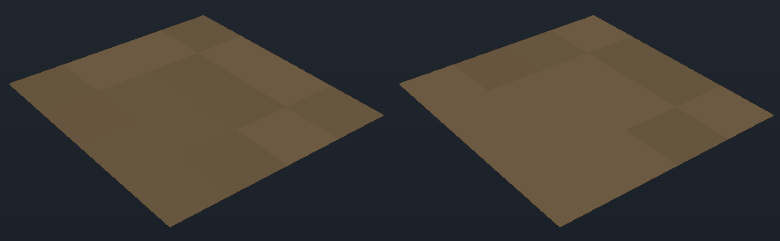
Comparison between Default (left), Fence (middle) and Decal (right) prop shaders.
Shader Properties
Some shaders have specific hidden properties, such as the PropRotating shader and AnimUV prop shader .
Variations
You can add multiple prop assets to your prop as variations using a probability value. The probability is a percentage out of 100, but the main prop has no probability so it gets whatever is left over, so if you have two variations with a 25% probability each, the main prop will get a 50% probability. The variations will be embedded into the main prop, but also show up as separate props in the menu.
Run this script using the ModTools console F7 to set the variation amount, and also calculate equal probability automatically.
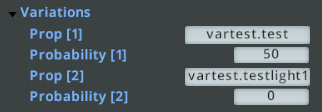
Prop variations menu in the asset editor.
Prefab Info Fields
To change variables of the asset, open the scene explorer Ctrl+E and go to Tool Controller > ToolController > m_editPrefabInfo. This is where you can find all the fields of the prop, note that some things can only be changed using scripts, and also not all changed fields will save.
m_illuminationBlinkType
Determines the animation of the prop illumination.
m_illuminationOffRange
Determines the upper and lower limit for how long the illumination is disabled during the daytime. For lights, this usually matches the off range of the light effect which can be found in m_effects > m_effects.[id] > m_effect > m_offRange. You can also use this script to change it using an hour value.
m_specialPlaces
Allows adding sitting places for citizens using this script .
m_parkingSpaces
Allows adding parking places for cars using this script .
Save
Filename
The filename input is on the bottom left, this is what the actual file will be called. It's not recommended to use spaces, dots, or special symbols.
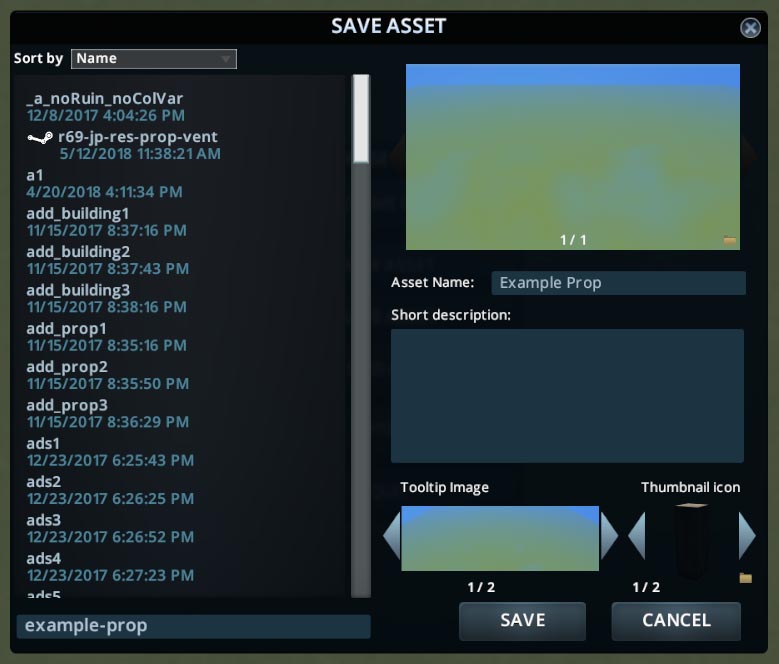
Save asset window.
Asset Name
The asset name visible ingame, the name people should search for.
Images
There are 2 different folders you can open by clicking the folder icons:
Snapshot
On the snapshot image, bottom right corner. Use this one to replace the snapshot, you can replace it with a 1x1 px image to save on the asset file size. This image will only be visible in the content manager. It will also default as the Steam preview image, but you can change that separately when publishing.
Thumbnail & Tooltip
Below thumbnail, on the right side. Use this one to change the thumbnail (109x100) and tooltip (492x147) of your asset.
Once you change the main thumbnail, the hover/active states will update automatically.
Local Assets Folder
Once the asset is saved, the .crp file will appear in the local assets folder:
%LocalAppData%\Colossal Order\Cities_Skylines\Addons\Assets
The AppData folder is hidden by default, you can access it by copying and pasting the path into the file explorer, or pressing Windows+R and typing in appdata.
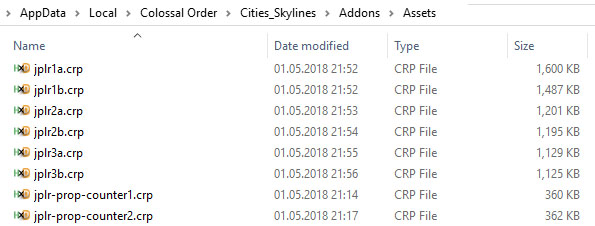
CRP files in the local assets folder.
Publish
Once you have saved the asset and reloaded the game, you can publish the asset.
Go to the content manager > assets and find your asset, then click share.
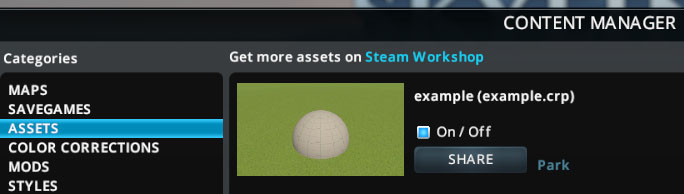
Share button in content manager.
Title and Description
You can change these on the Steam Workshop later.
Steam Preview Image and Content Folder
There is a folder icon again on the snapshot image, bottom right corner. Here you can change the Steam preview image, which is the thumbnail visible on steam. The largest size the image will be visible is 437x437 (on the front page) but it will get upscaled to 512x512 by Steam so that's the size you should use.
There is also the content folder, which is where the actual asset file is. You can paste multiple .crp files here if you would like to upload a pack of assets.
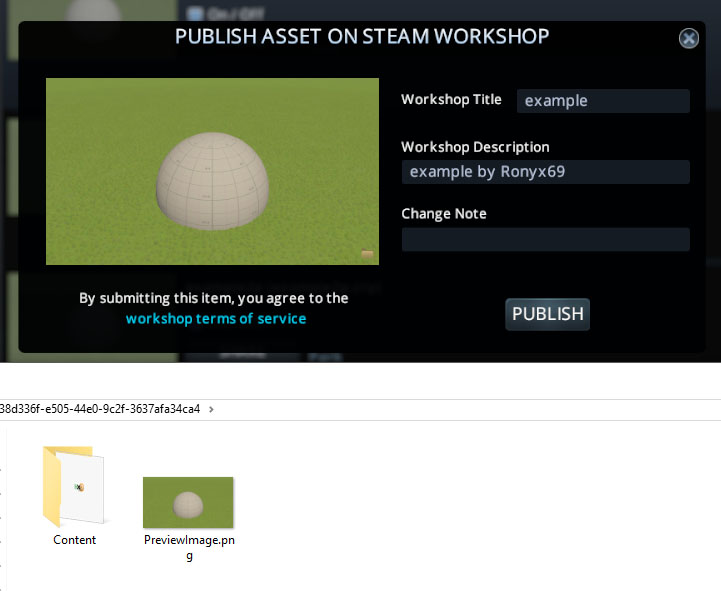
Publish window and content folder.
Steam Workshop
On the Steam Workshop page for your asset, you can:
- add it to a collection
- add images and videos
- add contributors and links
- add required items and DLC
- change visibility to friends only or private
Update
To update your own item, you must subscribe to it first, then it will show up in the content manager. It won't be the same as a local asset, as it will show an "update" button.
When you click update, click the folder icon, and now you can change the Steam preview image and put your new asset in the content folder. If updating a pack, remember to put all the assets inside the content folder.
You can also add more assets to make it a bigger pack.
Make sure your updated assets are saved with exactly the same name as before, otherwise, it will disappear from your subscribers' saves, as the game uses the internal prefab name to refer to it. In the case of networks (roads, tracks etc.) it may completely break a save.
Prefab Name
This is not something you can change.
It's the hidden internal name used to refer to your asset in savefiles.
It's the reason why a local asset is not the same as a workshop published asset.
For local assets: filename.Asset Name_Data
For published workshop assets: SteamID.Asset Name_Data
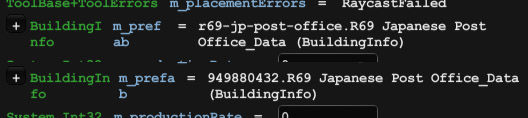
Comparison between local (top) and workshop published (bottom) prefab names shown in ModTools.