Building Asset Creation
Mesh
Main Mesh
This is a 3D model of the building, which will be visible when the camera is close to it. The actual mesh file contains vertices (their coordinates, UV mapping, normals, and colors) and triangles.
It's created using 3D modeling software such as Blender, 3ds Max, Maya or SketchUp.
Model Complexity
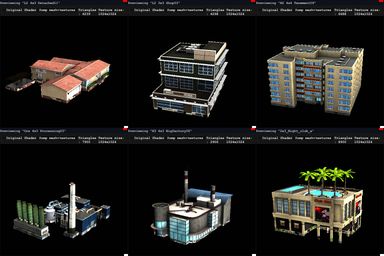
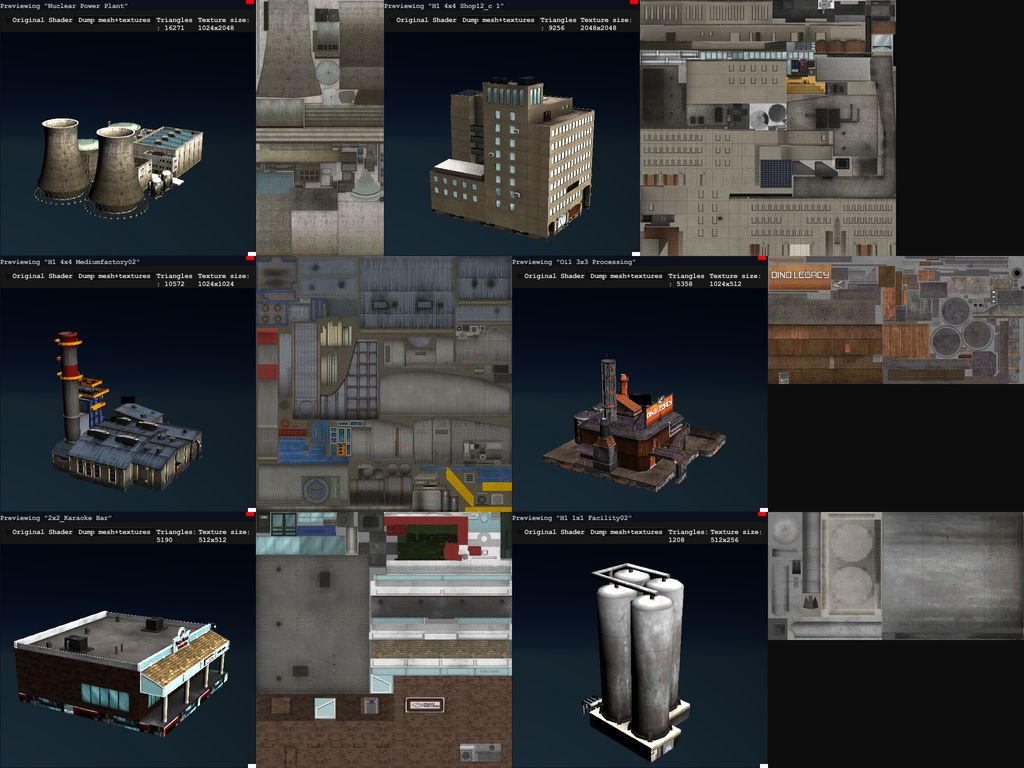
It's recommended to stay within reasonable triangle counts based on the size and detail of your model. You may look at examples of vanilla buildings or assets by other creators for reference.
The absolute limit for a mesh is 65536 vertices.
You can use Mesh Info by SamsamTS to check triangle counts of assets.
LOD Mesh
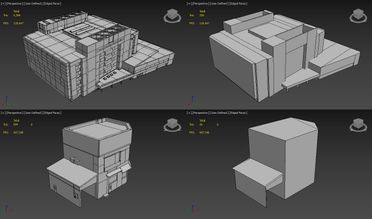
LOD stands for level of detail. This is the mesh visible from a distance. It must be as simple as possible.
If you don't provide an LOD mesh, the game will try to generate one automatically, which may have visual issues, so it's highly recommended to make a custom LOD using baking.
UV Mapping
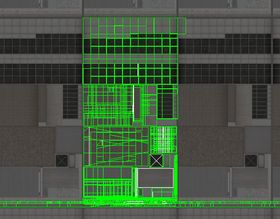
For the main mesh, you are allowed to UV map outside the 0-1 area (main tile), so you can tile the entire texture multiple times on a single face.
LOD
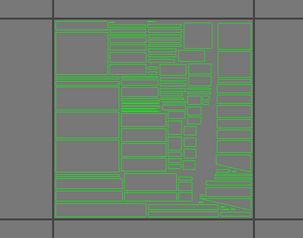
For the LOD mesh, the UV mapping must be within the 0-1 area (main tile) of the UV map, no tiling is allowed. This is because ingame all the LOD textures are combined into a single texture called an atlas, so having incorrect uv mapping will end up putting the texture of some other random building on your LOD.
Pivot / Origin
The pivot point or origin represents the center point on the ground of the lot. It's usually represented using a red/green/blue axis gizmo.
Transform
Make sure you are exporting a single object, which doesn't have any rotation or scale.
This can be done using
"apply rotation & scale" in Blender , or
"reset xform" in 3ds Max , and exporting only the selected object.
Vertex Paint
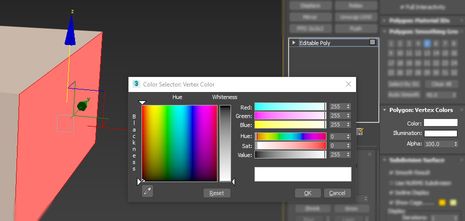
The vertex color blue channel determines snow behavior on winter maps:
- 128 means 3D snow will not be generated
- 0 means no snow will be visible at all
Formats
- FBX (2015 or older) (most commonly used)
- OBJ (doesn't support vertex colors)
- DAE
Textures
These determine the color and material properties of your building.
Resolution
All imported main textures must be the same resolution.
Powers of 2 is a standard practice in 3D graphics, which means resolutions such as 1024x1024, 1024x512, 256x512, 2048x128 etc. It is recommended to stick to this standard, otherwise, your texture may be corrupted by compression, which may be more visible at longer distances or grazing angles. The smallest allowed resolution is 32x32.
Make sure texture quality is set to high in the game's graphics settings, otherwise, your imported textures will be downscaled to a lower resolution.
LOD Textures
All imported LOD textures must be the same resolution.
If you don't provide LOD textures, the game will try to bake them using the UV mapping your LOD mesh has, and that may cause visual issues, so it's recommended that you create your own LOD textures using baking.
Diffuse
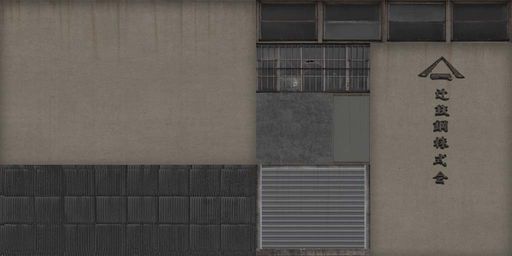
The main color and texture of your asset.
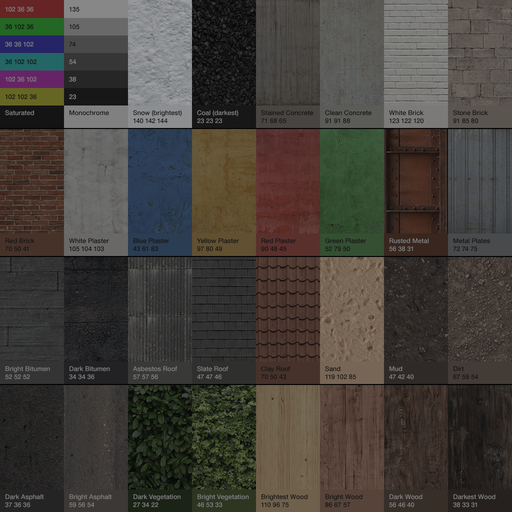
It will look very bright, contrasty, and saturated in the game, so make sure to reduce the saturation and limit the brightest parts to a medium/light gray below 140 RGB.
If you don't import a diffuse map, it will default to white.
Alpha
Transparency, white means opaque or visible, black means transparent or invisible. Gray values may affect how it looks from a distance or at an angle.
Semi-transparency is not supported, you need to use the rotors shader for that.
If you don't import an alpha map, it will default to fully opaque or fully visible.
Color
Determines which parts will be affected by color variations. White means fully affected and black means not at all.
The diffuse will get multiplied by the color variation, that means the resulting color will look darker than the original diffuse.
If you don't import a color map, it will default to full color, but the "use color variations" setting must be enabled for the colors to appear.
Illumination
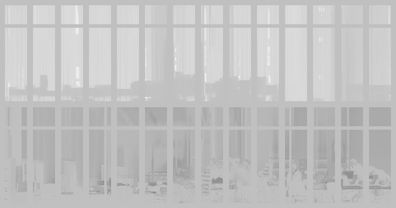
Buildings can have two different types of illumination - diffuse contribution illumination in the 0-120 range, which is almost never used, and random night window illumination in the 128-255 range, which is what most buildings use.
If you don't import an illumination map, it will default to no illumination.
Random Night Windows
Colors for randomly illuminated night windows:
- 192 (Neutral Background Color)
- 192-128 Inverted (First Set of Windows)
- 192-255 (Second Set of Windows)
You can create a black and white illumination texture and use a levels adjustment to set the output colors so that black becomes 192 and white becomes 128 for one set of windows, and black becomes 192 and white becomes 255 for the other set.
Diffuse Contribution
0-120 is always turned on illumination based on the diffuse. It's not recommended to mix the two different types of illumination on one texture as it can create aliasing problems.
Specular
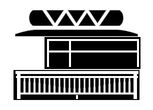
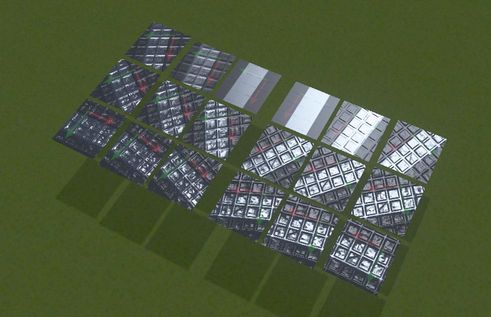
Reflectivity, bright values(above 80% or 205 RGB) will become "windows" where the fake interior floor will be visible.
The specular highlight from the sun is very big and bright, so you might want to use very low (0-10%) specularity for surfaces facing upwards, like roofs.
If you don't import a specular map, it will default to no specularity.
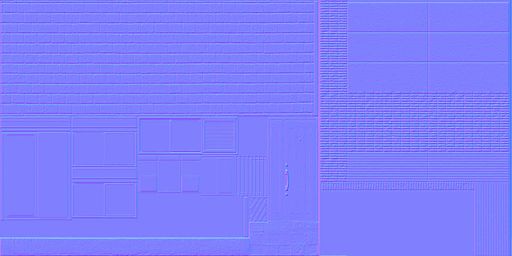
Normal
Also sometimes called a bump map, adds fake depth or form by affecting how the lighting appears.
This can be made from the diffuse or a height map (brighter colors will look extruded out more) using a normal map generator online , a photoshop plugin like xNormal , or standalone software such as CrazyBump .
The normal map generator should be set to +X +Y, which means no color channel inversions are required. Read more in the normal map article .
High specularity and normal map don't work well together because of the compression, so you might want to paint over your windows and other shiny parts with a solid color before generating a normal map or paint over these parts 128,128,255 on the final normal map.
If you don't import a normal map, it will default to a flat normal map - no bump.
Format
Use a lossless format like .PNG.
The game supports other formats as well, but there is no reason to use another one, it doesn't matter how much your texture is compressed or even if it's completely solid or complicated, the game will convert it to a DXT format, so the final size won't be affected by anything other than resolution.
Make sure the texture is 8 bits/channel because a 16 bits/channel image can't be imported. Do not use the "Smaller File (8-bit)" feature in the Photoshop Export As window, as that creates an indexed color image, not an 8 bits/channel one.
Import
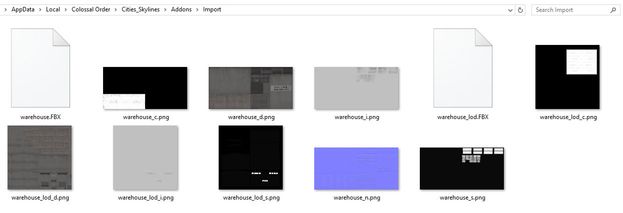
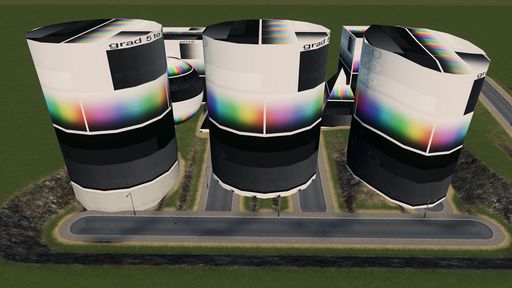
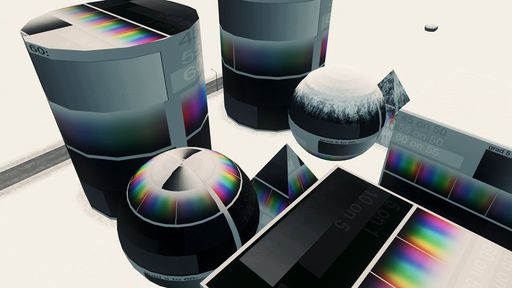
Example Asset
Source files of an example building ready for import.
Naming
The mesh can have any name, but it's not recommended to use spaces or underscores, as the name for the lod mesh name will be meshname_lod.
The textures must have the same name as the mesh, but with the texture type identifier after it, so the result will be names like meshname_d.png and meshname_lod_d.png
Import Folder
You should place the mesh and texture files in the import folder located here:
%LocalAppData%\Colossal Order\Cities_Skylines\Addons\Import
The AppData folder is hidden by default, you can access it by copying and pasting the path into the file explorer, or pressing Windows + R and typing in appdata.
Template
There is a "load existing props and decorations" toggle on the bottom left, this will load props and networks like roads/tracks/paths from your chosen template as well, useful when you need to reimport an already imported asset but don't want to place those things again.
The template you choose will determine many things about your building:
-
AI and corresponding stats (a school with students, a fire station with fire trucks etc.)
- milestone at which it is unlocked
- UI category
- item class (UI sub-category)
- general settings (flatten terrain, use color variations etc.)
- shader, material properties (color variations)
All of those things can be changed later in the editor itself or using ModTools or other mods.
Some types of buildings don't have a template, see specific cases for downloadable premade templates and instructions.
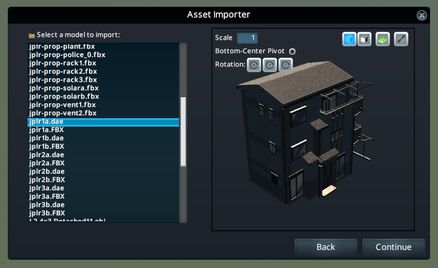
Import
After you choose your mesh, depending on how it was exported, you might need to set the correct scale and rotation, scale 100 and rotating 3 times around X-axis are common necessities.
Using the mesh rotation feature will result in broken mesh tangents - that means the normal maps will appear incorrectly or not at all on some parts. To fix this, don't use the rotation feature and make sure the mesh is rotated properly before import. If you need to use the mesh rotation feature - use the Mesh Import Rotation Tangents Fix mod to fix it.
If you get an unsupported color error, one of your textures might be a 16 bits/channel file, you need to change it to 8 bits/channel, in Photoshop: Image > Mode > 8 Bits/Channel.
If the mesh preview doesn't display or you can't continue, you may have a problem with it such as multiple mesh objects, other entities like dummies, cameras, lights, or layers in the exported file.
Editor
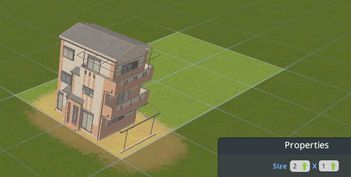
Lot Size
Size of the building area in cells, each cell is 8x8m.
For growables, the size is limited to 4x4.
For other buildings, max sizes are 16x8, 15x9, 14x11, 13x12, 12x13, 11x14, 9x15 and 8x16.
Make sure your building doesn't overhang the lot too much, as the overhanging parts will disappear when the building inside the lot isn't visible.
General Properties
- use color variations (may require to save/load for the toggle to take effect)
- availability (ingame, map editor etc.)
- circular lot (used for the vanilla wind turbine, water tower)
- expand front yard (puts optional yard for props in front instead of back)
- flatten full area (makes sure the terrain is flat up to the lot edges)
- flatten terrain (tries to flatten terrain in a softer way)
Stats
Based on which AI the building has, it can have different stats like electricity consumption, worker amount, police car count for a police station etc.
Material properties
You can change the 4 color variations, and also floor parameters which are used for the fake interior for 100% specular windows.
Networks
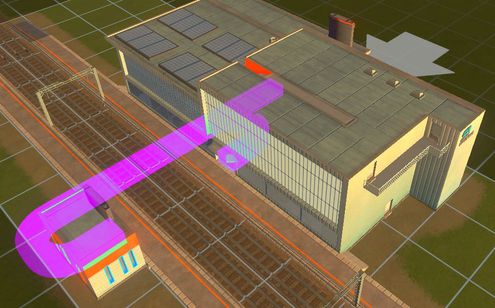
You can place networks such as roads, train/tram tracks, and pedestrian paths. Read more about network usage in specific cases such as train stations
You can use More Network Stuff by BloodyPenguin to use paths and other networks in the editor.
Props & Trees
You can place props such as benches, lights, and antennas.
If you place a prop on the ground, it will follow the terrain if the building is placed on uneven terrain. But if you place it on the building, it becomes fixed height, so it will always be at that height relative to the building.
You must use either vanilla or custom workshop published props and networks, not local custom ones, otherwise, they won't show up for the subscribers of your asset.
You can use Precise Prop Positioning by TPB to set the exact coordinates and rotation angle of props.
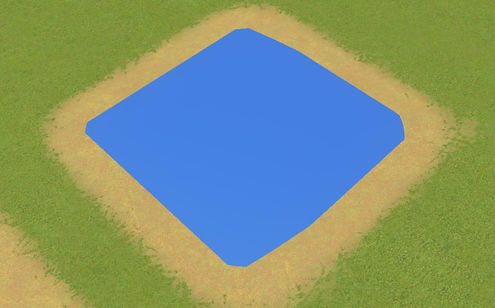
Surface
Each cell can have its own surface:
- Pavement (map theme texture)
- Gravel (map theme texture)
- Ruined (map theme texture)
- Field (map theme color)
- Clip (hole in the ground)
Markers
These are invisible props which have functionality such as building entry points, parking spaces or smoke particle effects.
Sub-buildings
You can add other buildings as sub-buildings to your main building. Unlike props, they are not references to another asset, they actually get embedded and saved into the main building asset.
This is useful for multi-function buildings or adding a part using a different shader.
The fixed height option makes sure the sub-building stays the same height even on uneven terrain.
Sub-buildings don't grow on growables, they are only visible if the growable is plopped manually.
If you just imported a building for it to be used as a sub-building, you need to reload the game for it to be properly loaded and available as a sub-building.
Sub-meshes
You can add additional meshes as sub-meshes, which appear only when specific conditions are met, for example - the vanilla landfill uses multiple sub-meshes to display how filled up it is.
Flags
Flags are required and forbidden conditions, which determine when the sub-mesh shows up.
There are many flags and their use is not always obvious so their descriptions might be incomplete or not relevant in all cases.
By default, not all sub-mesh flags (conditions) are visible, use the sub-mesh Flags mod by TPB to show all flags in the asset editor UI.
Created
Active for all created buildings.
Deleted
Unknown.
Original
Likely active for buildings which were on the map originally, not created by the user.
CustomName
Active for buildings which the user has renamed.
Untouchable
Likely active for buildings which cannot be clicked by the user.
FixedHeight
Likely active for buildings which will not change their height based on water level changes.
Incoming
Likely related to vehicles arriving at the building.
Outgoing
Likely related to vehicles leaving the building.
CapacityStep1 (First Half Filled)
Active for buildings which have their capacity at 50%, such as cemetaries, landfills, snow dumps, warehouses, or processing facilities.
CapacityStep2 (Second Half Filled)
Same as CapacityStep1 but 100%.
RateReduced
Likely active for buildings which are operating at a reduced rate.
HighDensity
Likely active for high density residential and commercial buildings.
LevelUpEducation
Unknown.
LevelUpLandValue
Unknown.
RoadAccessFailed
Likely related to pathfinding failure.
Evacuating
Likely active for buildings during disaster evacuation.
Completed
Active for buildings which have completed being constructed.
Active
Active for operating buildings.
Abandoned
Active for abandoned buildings.
Demolishing
Unknown.
ZonesUpdated
Related to zoning being updated.
Downgrading
Unknown, likely related to buildings with capacity being emptied.
Collapsed
Likely active for collapsed buildings.
BurnedDown
Same as Collapsed. Likely active for buildings which have burned down.
Upgrading
Likely active for buildings which are leveling up.
Loading1
Related to animation playback on cargo station buildings.
Loading2
Related to animation playback on cargo station buildings.
SecondaryLoading
Related to animation playback on cargo station buildings.
Hidden
Unknown.
EventActive
Unknown.
Flooded
Likely active for buildings which are flooded.
Filling
Unknown.
Historical
Likely used for buildings which have been marked as historical by the player.
Editor Advanced
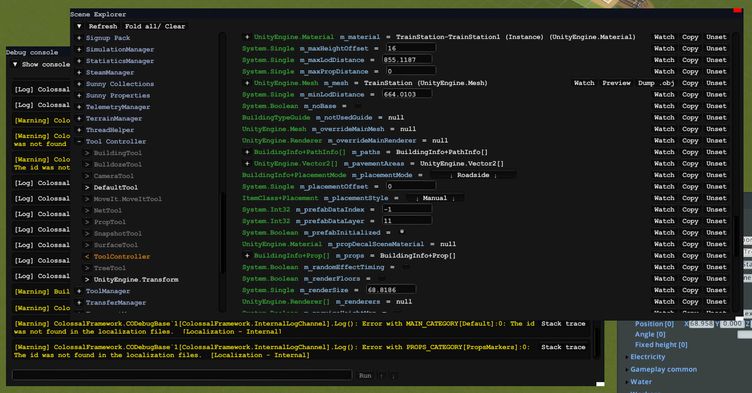
Various things can be changed with the use of ModTools scene explorer Ctrl+E or running scripts in the console F7, or specific mods.
AI
AI defines how the building behaves and what values it has. It can be changed using Asset AI Changer by Snow_Cat & cerebellum .
If you want a functionless decorative building, DecorationBuildingAI is a good choice.
But if you want your building to be sinkable into the ground without lowering terrain - use BuildingAI, however, a side effect is it won't get wet in the rain, or snowy on winter maps.
Item Class
Contains information about what type and level of building it is. It can be changed using Asset ItemClass Changer by Snow_Cat .
UI Category
UI category determines in which menu your asset will appear. It can be changed using Asset UI Category Changer by Snow_Cat .
UI Priority
UIPriority determines item order in the menu. It can be changed Asset UI Priority Changer by Snow_Cat or a script .
Shaders
Default
Default extends the base mesh into the ground and applies the map theme building base texture to it.
NoBase
When using the default building shader, parts that are under 0 (ground) will get the map theme building base texture.
NoBase doesn't replace the underground texture with the building base texture.
The base mesh may still be visible, as it's generated on import for edges closer than 5cm to 0 (ground). It is possible to delete the base mesh completely using this script .
This shader also has a side-effect of increased reflectivity for high specularity areas.
Fence
Fence conforms to the terrain. (used for the vanilla cemetery and Japanese garden)
Floating
Floating waves in water. (used for Mass Transit DLC boat museum steamboat)
Shader Properties
Some shaders have specific hidden properties, such as the WindTurbine shader and AnimUV building shader .
Placement Mode
This determines how your asset must be placed:
- Roadside
- Shoreline
- OnWater (also disables water collision)
- OnGround (can't be placed on water)
- OnSurface (same as OnGround but can be placed on water)
- OnTerrain (same as OnSurface but in water, not on it)
- ShorelineOrGround
- PathsideOrGround
It can be changed with ModTools scene explorer Ctrl+E by going to Tool Controller > ToolController > m_editPrefabInfo > m_placementMode.
Zoning Mode
This is used only for growables to make them grow only on corners:
- Straight (default)
- CornerLeft
- CornerRight
It can be changed with ModTools scene explorer Ctrl+E and going to Tool Controller > ToolController > m_editPrefabInfo > m_zoningMode.
Specific Cases
This section covers some specific types of buildings which do not have a template or require special instructions. It will also make references to using ModTools , and other mods mentioned in the editor advanced section .
For buildings such as stations and harbors, Advanced Buildings Editor by BloodyPenguin is recommended for making all segments editable and auto-placing spawn points which are used to spawn trains, ships, or planes.
Various station tracks and invisible connection paths can be accessed in the asset editor road and decoration menu by using More Network Stuff by BloodyPenguin and they can be moved using Move It! .
Train Station
The train station has a template.
Train stations require a train station track, which contains pedestrian stop paths 1 meter above the track where citizens wait for the train. The stations also have invisible pedestrian connection paths leading to the station track.
Cargo Train Station
Cargo train station doesn't have a template. You can download a premade template here or you can use the regular train station template, but change the AI to CargoStationAI and the item class to Train Cargo Facility.
Cargo train stations work with any train station track, but a special cargo station track which doesn't have pedestrian stop paths exists. They also have invisible cargo connection paths which are used by the cargo vehicles to enter and exit the station.
Harbor
The harbor has a template.
Harbors require a ship dock path and ship dockway paths, and also a pedestrian connection path.
Cargo Harbor
Cargo harbor doesn't have a template. You can download a premade template here or you can use the regular harbor template, but change the AI to CargoHarborAI and the item class to Ship Cargo Facility.
Cargo harbors require a ship dock path and ship dockway paths, and also a pedestrian connection path.
Airport
Airports have templates.
Airports use runways and taxiways as expected. For the terminals they use airplane stop paths.
Monorail Station
Monorail stations have templates.
The monorail station track and road can be accessed by using the ModTools scene explorer Ctrl+E and going to Expansion 4 > NetCollection > m_prefabs > Monorail Station Track / Medium Road Monorail Elevated > Plop.
Cable Car Stop
Cable car stops have templates.
The cable car stop networks can be accessed by using the ModTools scene explorer Ctrl+E and going to Expansion 4 > NetCollection > m_prefabs > CableCar Stop > Plop.
Save
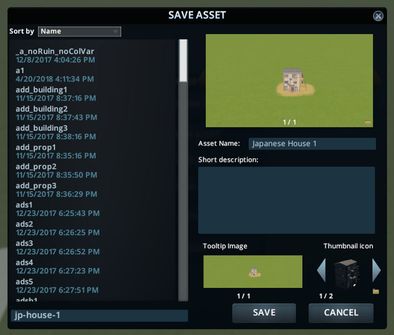
Filename
The filename input is on the bottom left, this is what the actual file will be called. It's not recommended to use spaces, dots, or special symbols.
Asset Name
The asset name visible ingame, the name people should search for.
Images
There are 2 different folders you can open by clicking the folder icons:
Snapshot
On the snapshot image, bottom right corner. Use this one to replace the snapshot, you can replace it with a 1x1 px image to save on the asset file size. This image will only be visible in the content manager. It will also default as the Steam preview image, but you can change that separately when publishing.
Thumbnail & Tooltip
Below thumbnail, on the right side. Use this one to change the thumbnail (109x100) and tooltip (492x147) of your asset.
Once you change the main thumbnail, the hover/active states will update automatically.
Local Assets Folder
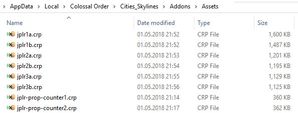
Once the asset is saved, the .crp file will appear in the local assets folder:
%LocalAppData%\Colossal Order\Cities_Skylines\Addons\Assets
The AppData folder is hidden by default, you can access it by copying and pasting the path into the file explorer, or pressing Windows+R and typing in appdata.
Publish
Once you have saved the asset and reloaded the game, you can publish the asset.
Go to the content manager > assets and find your asset, then click share.
Title and Description
You can change these on the Steam Workshop later.
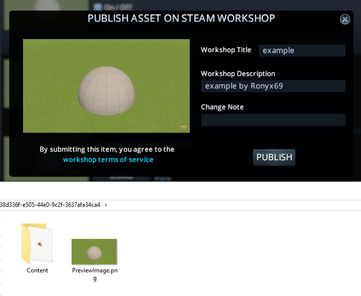
Steam Preview Image and Content Folder
There is a folder icon again on the snapshot image, bottom right corner. Here you can change the Steam preview image, which is the thumbnail visible on steam. The largest size the image will be visible is 437x437 (on the front page) but it will get upscaled to 512x512 by Steam so that's the size you should use.
There is also the content folder, which is where the actual asset file is. You can paste multiple .crp files here if you would like to upload a pack of assets.
Steam Workshop
On the Steam Workshop page for your asset, you can:
- add it to a collection
- add images and videos
- add contributors and links
- add required items and DLC
- change visibility to friends only or private
Update
To update your own item, you must subscribe to it first, then it will show up in the content manager. It won't be the same as a local asset, as it will show an "update" button.
When you click update, click the folder icon, and now you can change the Steam preview image and put your new asset in the content folder. If updating a pack, remember to put all the assets inside the content folder.
You can also add more assets to make it a bigger pack.
Make sure your updated assets are saved with exactly the same name as before, otherwise, it will disappear from your subscribers' saves, as the game uses the internal prefab name to refer to it. In the case of networks (roads, tracks etc.) it may completely break a save.
Prefab Name
This is not something you can change.
It's the hidden internal name used to refer to your asset in savefiles.
It's the reason why a local asset is not the same as a workshop published asset.
For local assets: filename.Asset Name_Data
For published workshop assets: SteamID.Asset Name_Data
