About
While many things can be changed using ModTools scene explorer or other mods, some things require using scripts . This article explains some basics of C#(C Sharp) programming in the context of Cities: Skylines scripting.
It's highly recommended to use a text editor with C# syntax highlighting such as Sublime Text .
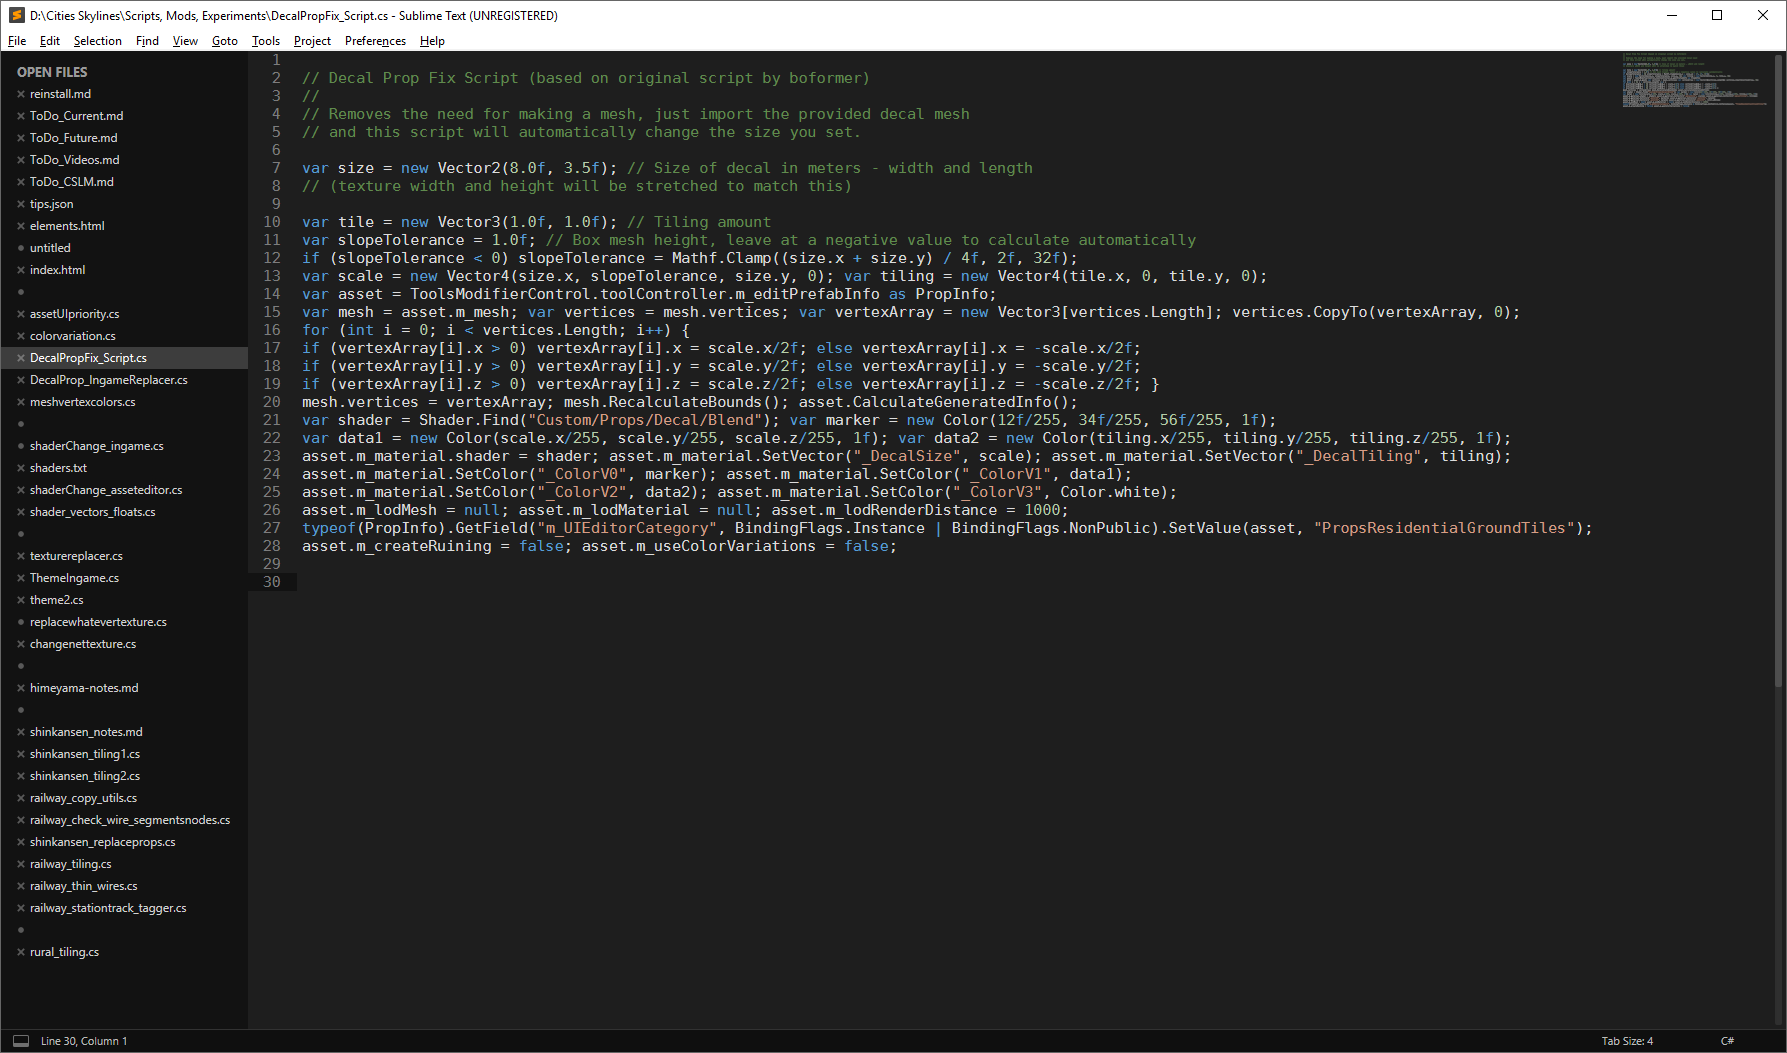
Decal Prop Fix script in Sublime Text.
Basics
Before getting into examples, this section describes some basic elements of code you will see a lot.
Variables
Variables are things like numbers, text strings, booleans(true/false), arrays(multiple variables in one), references to any field and many other things.
Usually, variables can be initialized(created) by simply writing var but
it's also possible(and sometimes necessary) to specify what type of variable it is, such as string or bool etc.
Some examples:
var number = 15;
string text = "Lorem ipsum dolor sit amet";
bool binary = true;
Debug Log
Debug log allows to print messages in the console:
Debug.Log("This will appear in the console when executed.");Comments
Comments allow adding notes to your script, they will not affect the code in any way. Everything after a
double slash //
will appear as a comment:
var number = 69; // some random notes
It's also possible to use /* */ to comment multiple lines or a specific
area:
/*multi
line
comment*/

var number = /*comment in between code*/ 69;
Examples
In general, each example will be more complicated than the previous one, and may not repeat explanations from simpler scripts.
UI Priority
The first example is for one of the simplest possible scripts - to change the UI Priority value. It's possible to change this value using the ModTools scene explorer or a specific mod, but this example will show how to change it using a script.
Here is a script which changes the UI Priority of the currently loaded building in the asset editor:
var asset = ToolsModifierControl.toolController.m_editPrefabInfo as BuildingInfo;
asset.m_UIPriority = 69;
The first line is what you will usually see in scripts for use in the asset editor. It creates a
variable called asset and gets m_editPrefabInfo,
which is the currently loaded asset in the asset editor. It also specifies to get it as BuildingInfo, this makes sure you can access all the fields a building might have.
The second line sets the field m_UIPriority of asset to 69.
Each line of code usually has a semicolon ; at the end of it.
Color Variations
This script can be used to set color variations for a building in the asset editor.
var color1 = new Color32(128, 128, 128, 255);
var color2 = new Color32(128, 128, 128, 255);
var color3 = new Color32(128, 128, 128, 255);
var color4 = new Color32(128, 128, 128, 255);
var asset = ToolsModifierControl.toolController.m_editPrefabInfo as BuildingInfo;
asset.m_material.SetColor("_ColorV0", color1);
asset.m_material.SetColor("_ColorV1", color2);
asset.m_material.SetColor("_ColorV2", color3);
asset.m_material.SetColor("_ColorV3", color4);
The first four lines create new variables which contain the chosen colors. Here new Color32 means a new variable of the type
Color32 will be created.
The difference between Color and Color32 is that
Color32 allows using values of 0-255 instead of floating point values
0.0-1.0. There are four values - red, green, blue, alpha. In this context, the alpha value is not
relevant.
The last four lines use the method SetColor to set the colors of asset.m_material to the previously created colors.
For the color variations to work, the "use color variations" option for the building must be enabled. It's possible to add a line to the script to enable it as well:
asset.m_useColorVariations = true;For the color variations to be visible in the asset editor, the asset may need to be saved and loaded again.
Placement Mode
This script can be used to change the placement mode of a building, which determines how the player must place it.
var asset = ToolsModifierControl.toolController.m_editPrefabInfo as BuildingInfo;
asset.m_placementMode = BuildingInfo.PlacementMode.Roadside;
The second line sets the field m_placementMode of asset to BuildingInfo.PlacementMode.Roadside.
To find out what values can be used in this field, you can use ILSpy to see the content of BuildingInfo.PlacementMode.
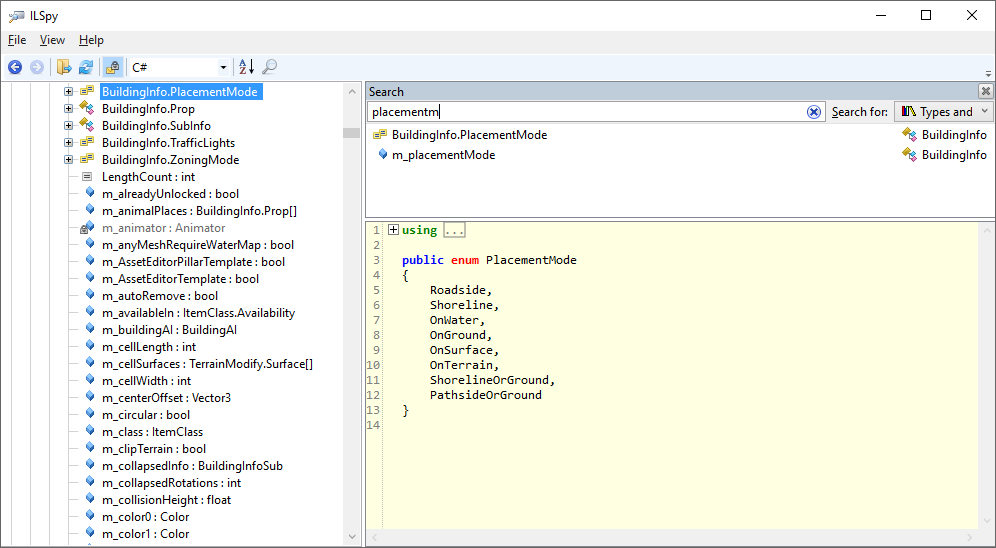
BuildingInfo.PlacementMode in ILSpy.
Editable Properties
Ways to find the names of fields which can be used in scripts.
Scene Explorer
The ModTools scene explorer can be used to explore game objects and see their properties.
Read the ModTools article for more information.
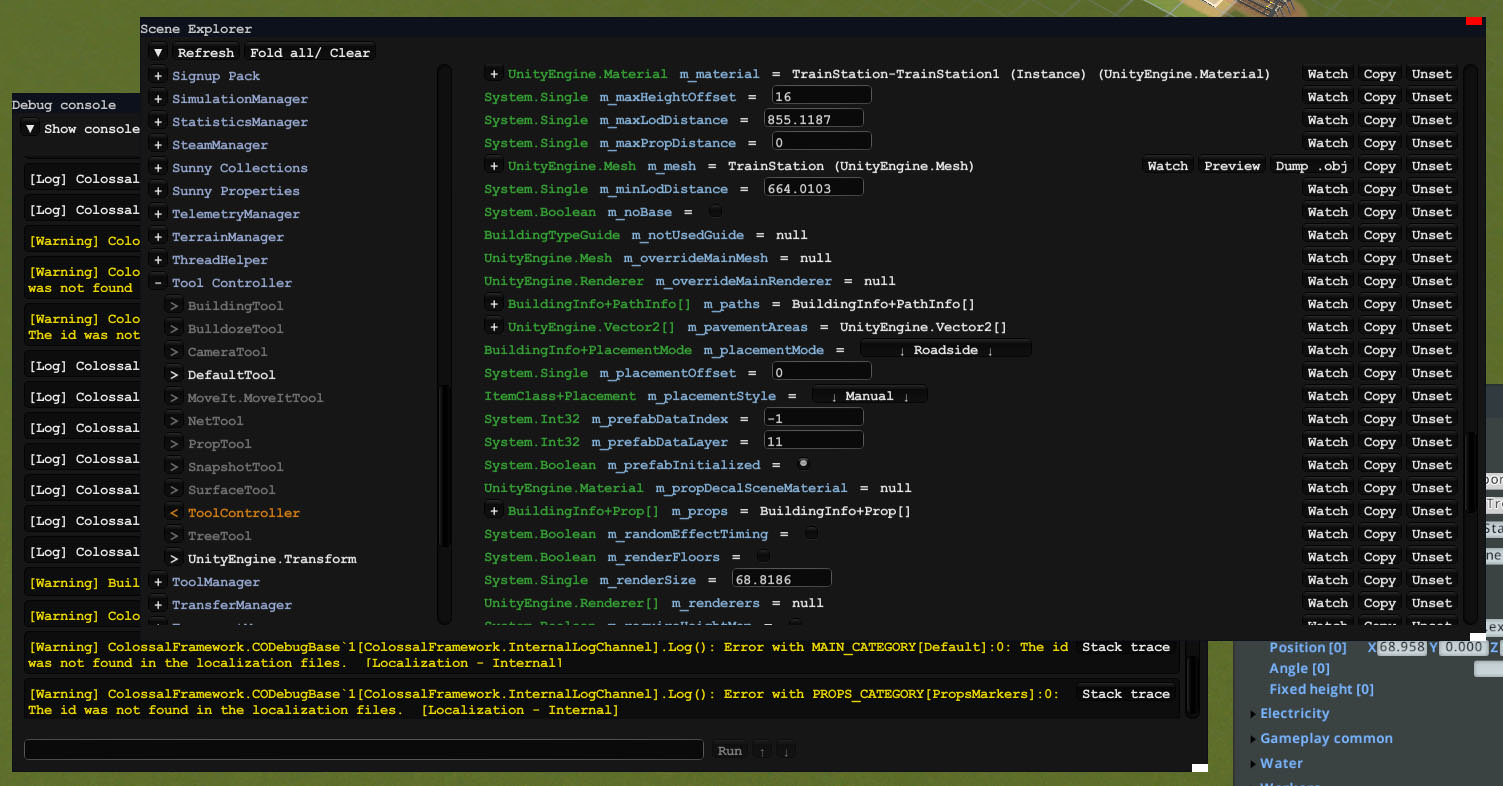
ModTools scene explorer and console.
ILSpy
ILSpy is the open-source .NET assembly browser and decompiler. It can be used to see the game code and which classes contain which fields.
Use ILSpy to open this file:
C:\Program Files
(x86)\Steam\steamapps\common\Cities_Skylines\Cities_Data\Managed\Assembly-CSharp.dll
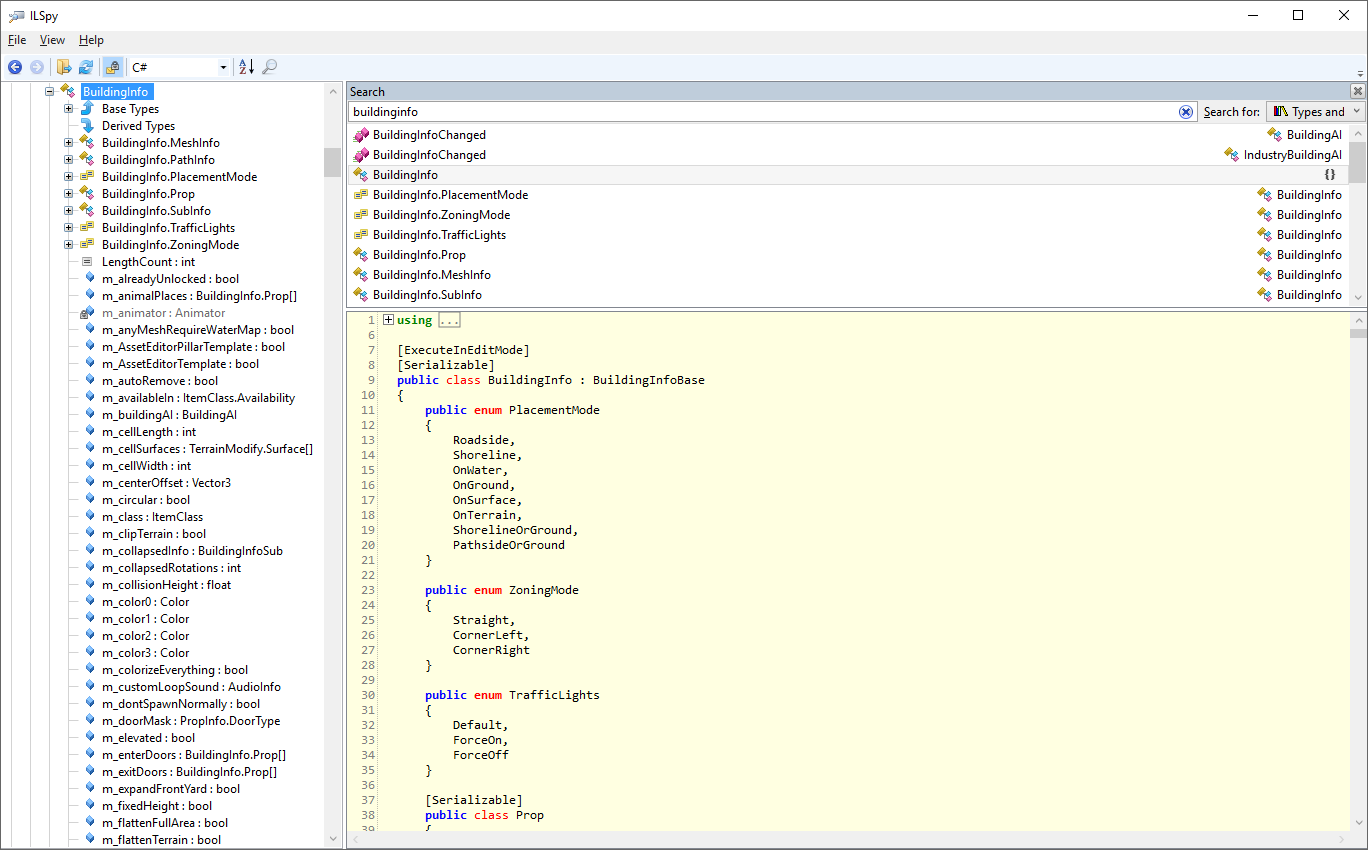
BuildingInfo in ILSpy.
dnSpy
dnSpy is a .NET debugger and assembly editor. It can be used to see the game code and which classes contain which fields.
Use dnSpy to open this file:
C:\Program Files
(x86)\Steam\steamapps\common\Cities_Skylines\Cities_Data\Managed\Assembly-CSharp.dll
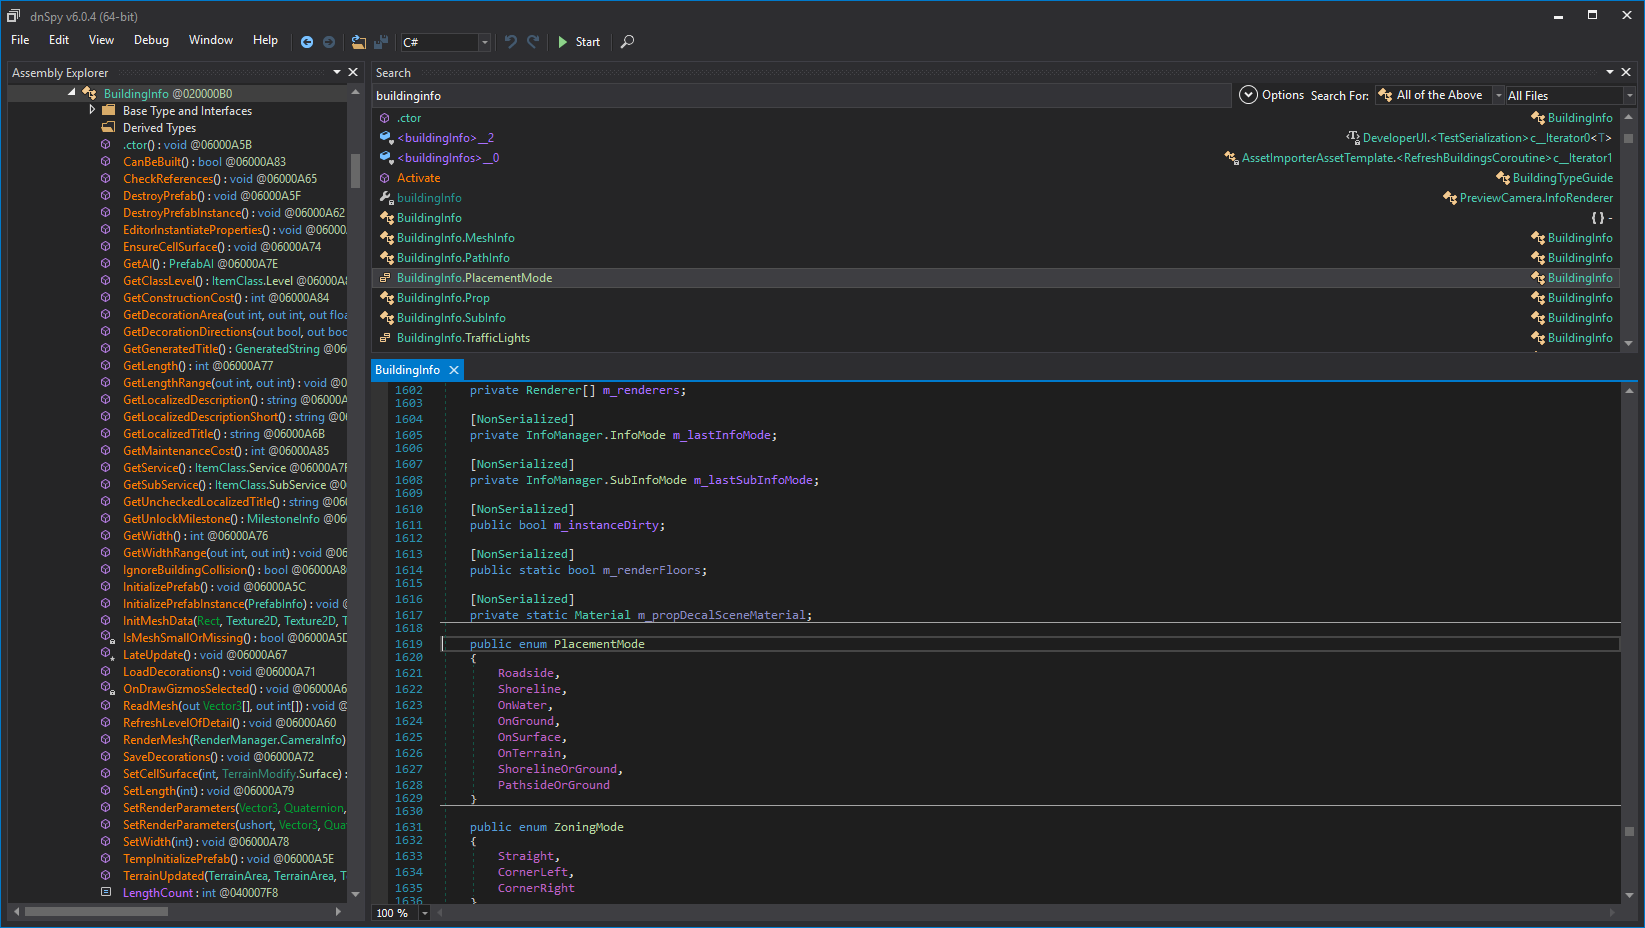
BuildingInfo in dnSpy.