About
The Custom Animation Loader (CAL) mod by boformer can be used to import custom animations for buildings. Animations have an inactive and active state so it's possible to stop the animation when the building is not operating.
This article assumes you are familiar with building asset creation.
Requirements
3D Software
The animation must be created using bones and keyframes. The mesh with the bones should be exported to FBX (2015 or older) as Y-up for importing in Unity. Also, the mesh without the bones should be exported for importing into the game as usual.
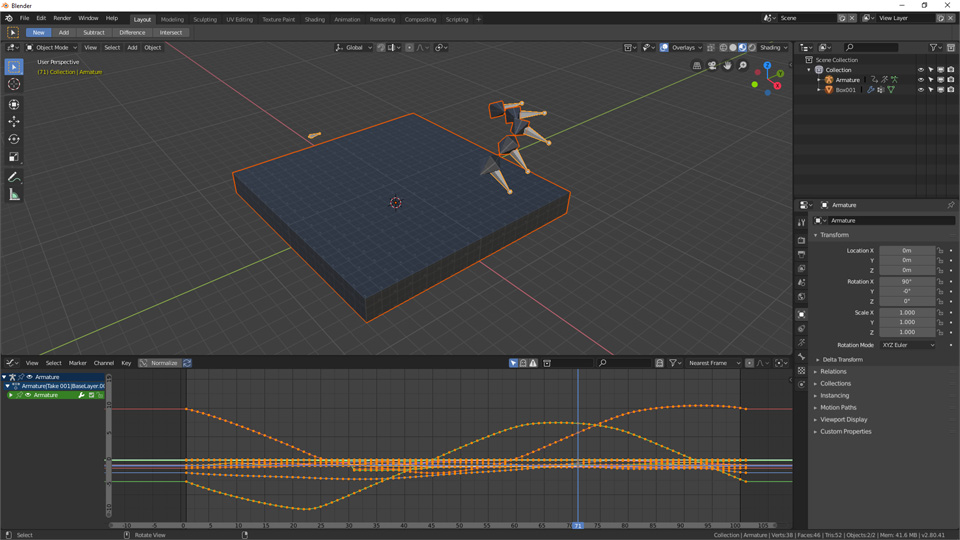
Mesh with bones and keyframes in blender.
Inactive Animation
If your software supports multiple animations (Blender does but 3ds Max doesn't) you can add another animation, which has only 2 keyframes which have no movement, so this can be used for the inactive state.
Unity Editor
You need Unity Editor 5.6.6 to set up the animator and create an asset bundle which the mod will read.
Unity Editor
Launch the Unity Editor and create a new project in a folder you will be able to find later.
Prefab
In the hierarchy window, create an empty GameObject by clicking "Create Empty". Now in the inspector window rename the GameObject to the exact asset name you will use ingame (not the filename). You may also move the object to 0 by changing all Transform XYZ positions to 0.
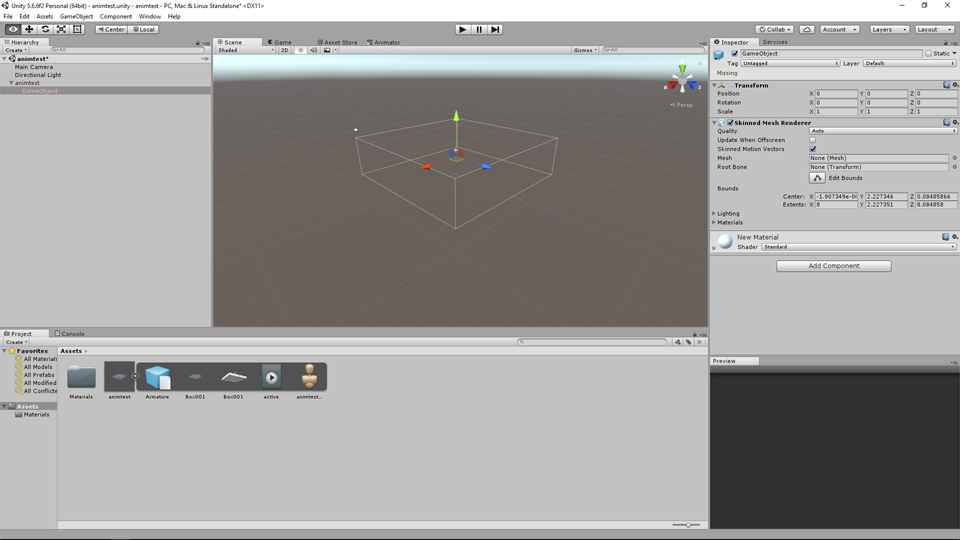
Game objects in Unity Editor.
Animator
In the inspector window click the "Add Component" button and add a component called "Animator".
Skinned Mesh Renderer
Now in the hierarchy window right-click the GameObject you just created and click "Create Empty" to create a new GameObject inside it. Add a component called "Skinned Mesh Renderer" to it.
Mesh
Drag & drop the mesh file into the Unity Editor projects window. Now click the mesh and in the inspector window click the animations tab. Here you can see animation clips in the mesh and also play the animation in the preview window on the bottom. You should rename the main animation clip to "active". If you have the inactive animation in your mesh, rename that to "inactive". Also, you should enable the "Loop Time" checkbox for the active animation.
Inactive Animation
If you didn't include the inactive animation in your mesh, you can create one in Unity Editor.
In the project window, click "Create" and choose "Animation" and call it "inactive". Now click the right arrow on the mesh you imported before, and click the active animation. Then go to Window > Animation, press Ctrl+A to select all keyframes and Ctrl+C to copy them.
Select the inactive animation you just created and Ctrl+V to paste the keyframes. Zoom out by holding Alt and scrolling down. Select all keyframes except the starting ones on the left side and delete them. This creates a single frame static animation.
Animation Controller
In the project window, create an "Animation Controller" and double click it to open the Animator window. Drag the inactive and active animation clips into this window. If your animation clips were named something other than "active" and "inactive", make sure to rename the nodes to these names.
Right-click the inactive node and click "Set as Layer Default State".
In the animator window on the left side click the "Parameters" tab, click the + button and add Float called "Speed" and Int called "State".
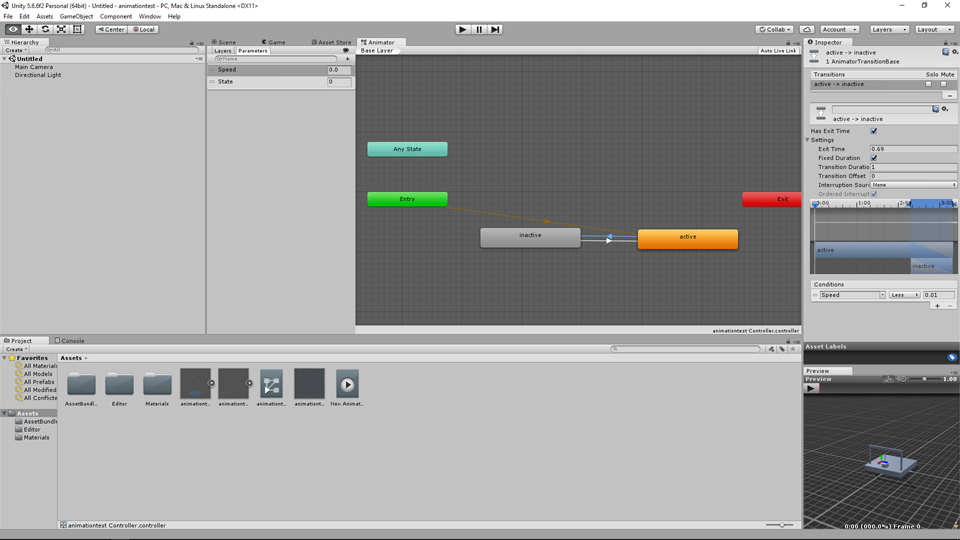
Animator window and transition.
Transitions
Right-click the inactive node, click "Make Transition" and click the active node. Now click the white transition arrow. In the inspector window open the settings and change the transition duration. In the conditions section, add a new condition by pressing the + button, set this condition to "Speed" "Greater" "0.01".
Right-click the active node, click "Make Transition" and click the inactive node. Now click the new white transition arrow. In the conditions section, add a new condition button and set it to "Speed" "Less" "0.01".
Assignment
Animator Controller & Avatar
Now you can close the animator window and view the scene window again. In the hierarchy window select the main GameObject you created and renamed in the beginning. In the inspector window animator section, click the circle next to "Controller" and choose the animator controller you created before. Right below this add the Avatar which was included in the imported mesh.
Skinned Mesh Renderer
Select the GameObject you created inside the main one, the one which has the Skinned Mesh Renderer component. In the inspector window skinned mesh renderer section click the circle next to "Mesh" and select your imported mesh. The magenta mesh should be visible in the scene window.
Optimize Transform Hierarchy
In the hierarchy window select the main GameObject you created and renamed in the beginning. In the inspector window animator section, click the gear icon in the top right and click "Optimize Transform Hierarchy". This may visually break your mesh, but once the animation plays it should appear correctly.
Material
In the projects window, drag and drop your diffuse texture into the assets folder. Now select the materials folder and select the default material or create a new one. In the inspector window click the circle next to "Albedo" and pick your texture. Now you can drag & drop this material onto your mesh. The texture can be deleted later so it doesn't take up space in the prefab asset bundle.
Play
Now you can click the play button on the top toolbar. Open the animator window and set the speed parameter to 1.0 and look at the scene window, now the animation should be playing.
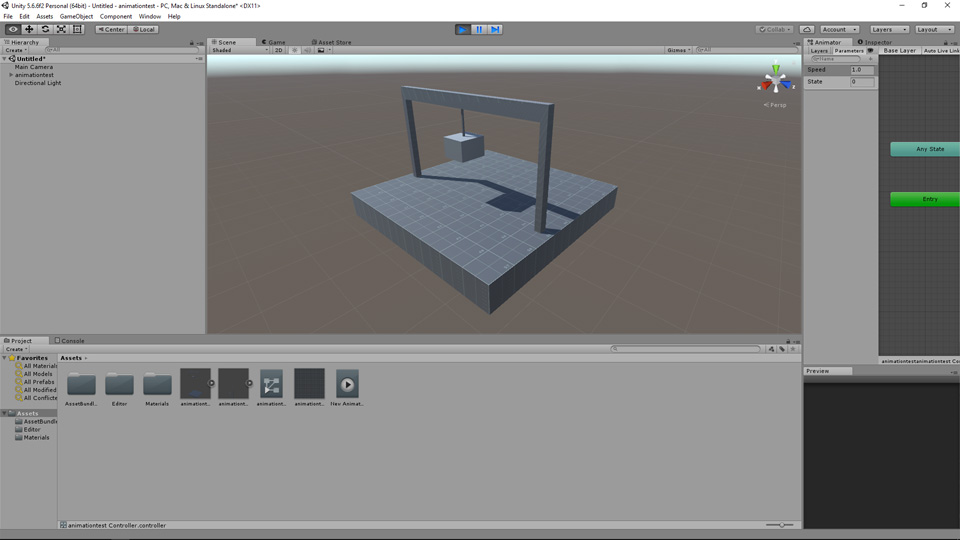
Still of animation being played in Unity Editor.
Prefab & Asset Bundle
In the hierarchy window select the main GameObject you created and renamed in the beginning, drag it into the project window assets folder and click it. In the bottom of the inspector window click the AssetBundle dropdown and click "New" and give it a unique name, it can't be the same as any other asset bundle of any other asset.
In the project window assets folder create two new folders - one called "AssetBundles" and the other called "Editor".
Download the CreateAssetBundles script and drag & drop it into projects window "Editor" folder you just created. Then in the top menu click Assets > Build AssetBundles
Import & Test
You can now import the building into the game using the asset editor as usual.
Remember that your asset name should be exactly the same as the name you chose for the main GameObject in Unity Editor.
Once you have imported and saved your asset, quit the game. Go to the folder where your unity project is > Assets > AssetBundles and copy the asset bundle (but not the manifest or meta files) you named in Unity Editor before. Now go to your local assets folder, create a new folder, put the .crp of the asset you just saved and also the asset bundle in this folder. Rename the asset bundle file to "animations.unity3d".
Open the game and test your asset, the asset may need power and some time to start animating.
Publish
You can publish the asset as usual, but you must include the asset bundle in the content folder. Make sure the mod is enabled while you publish the asset, this will add a custom tag which can be used to find all custom animation loader assets in the steam workshop.